之前家里的 NAS 上跑了很多 app,他们每个都有自己认证的方式,非常乱。我需要记忆很多密码。
最难受的是很多 app 不支持 passkey 认证,导致我的 yubikey 白买了。
而且这样攻击面很大,一个 app 不安全,黑客就能搞很多事情。
所以为了统一我家里的账户的身份,我决定搭一个 Authentik。
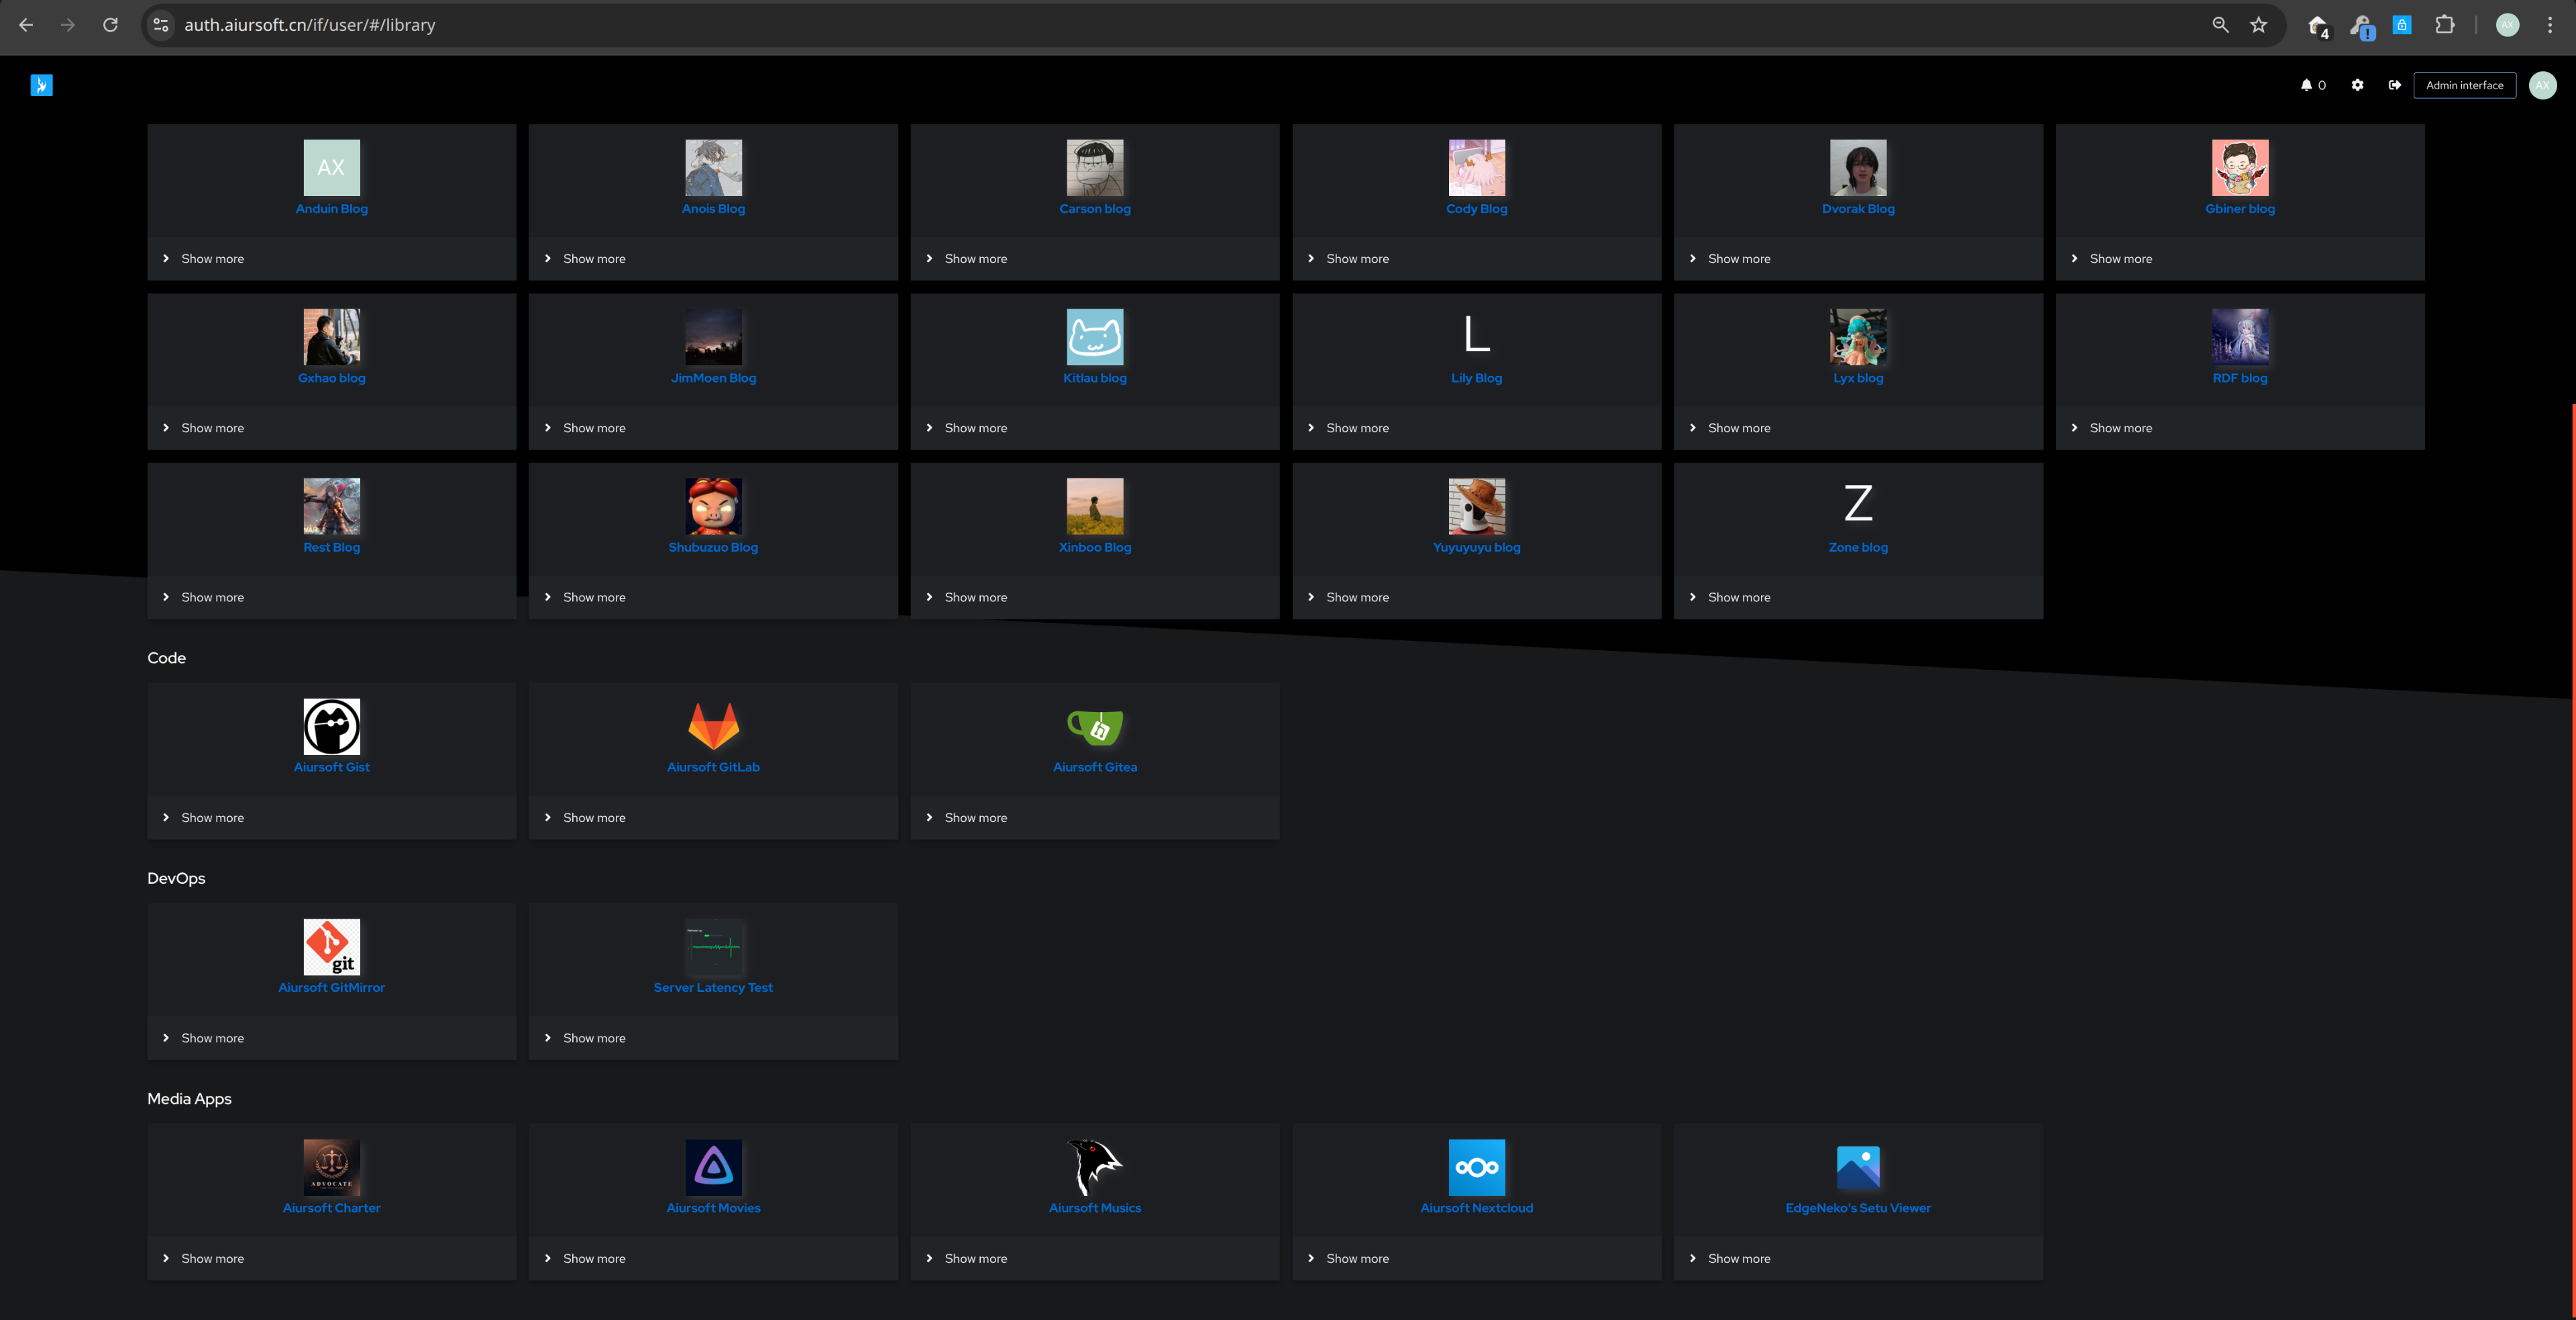
搭了以后,一次登录,所有应用都能使用。中心化配置权限,谁能干什么一目了然。统一日志审计。最重要的是:
缩小了攻击面。黑客现在攻击任何应用都只能先攻击一个大门,而这个大门极其坚固。
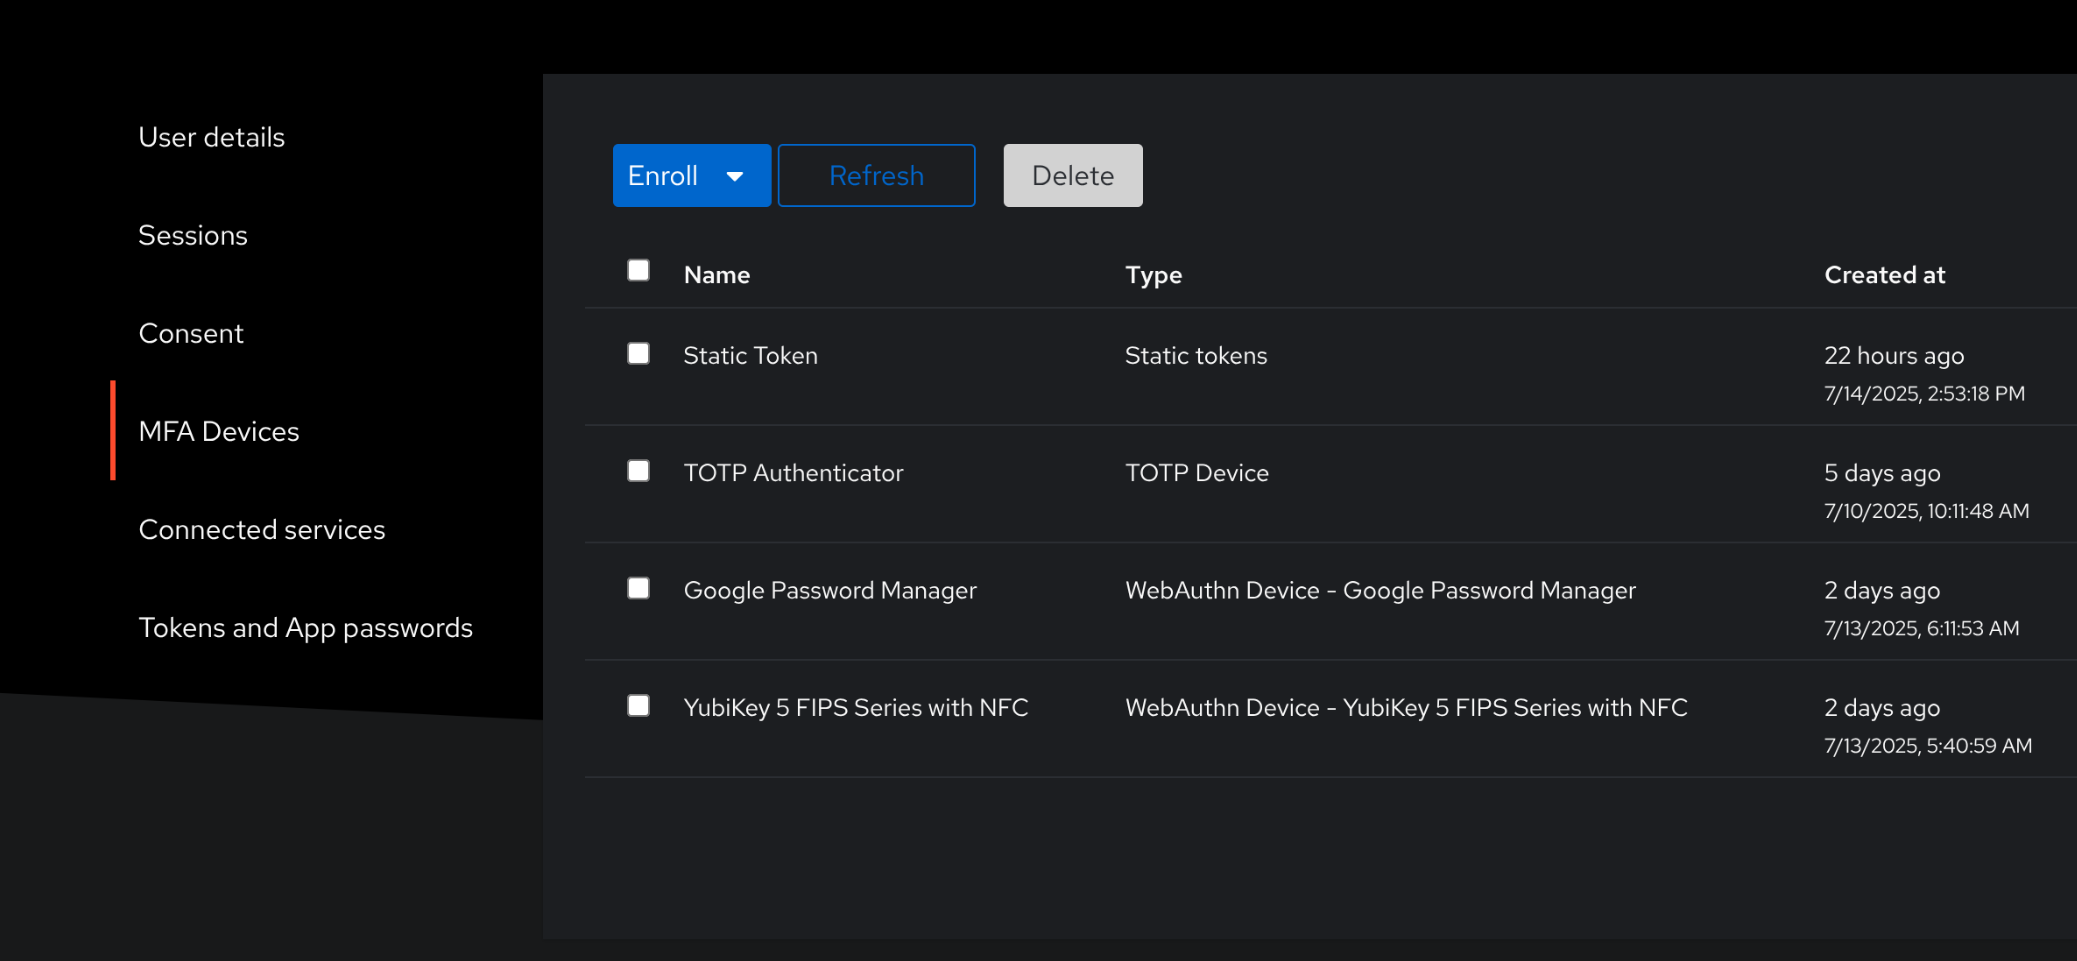
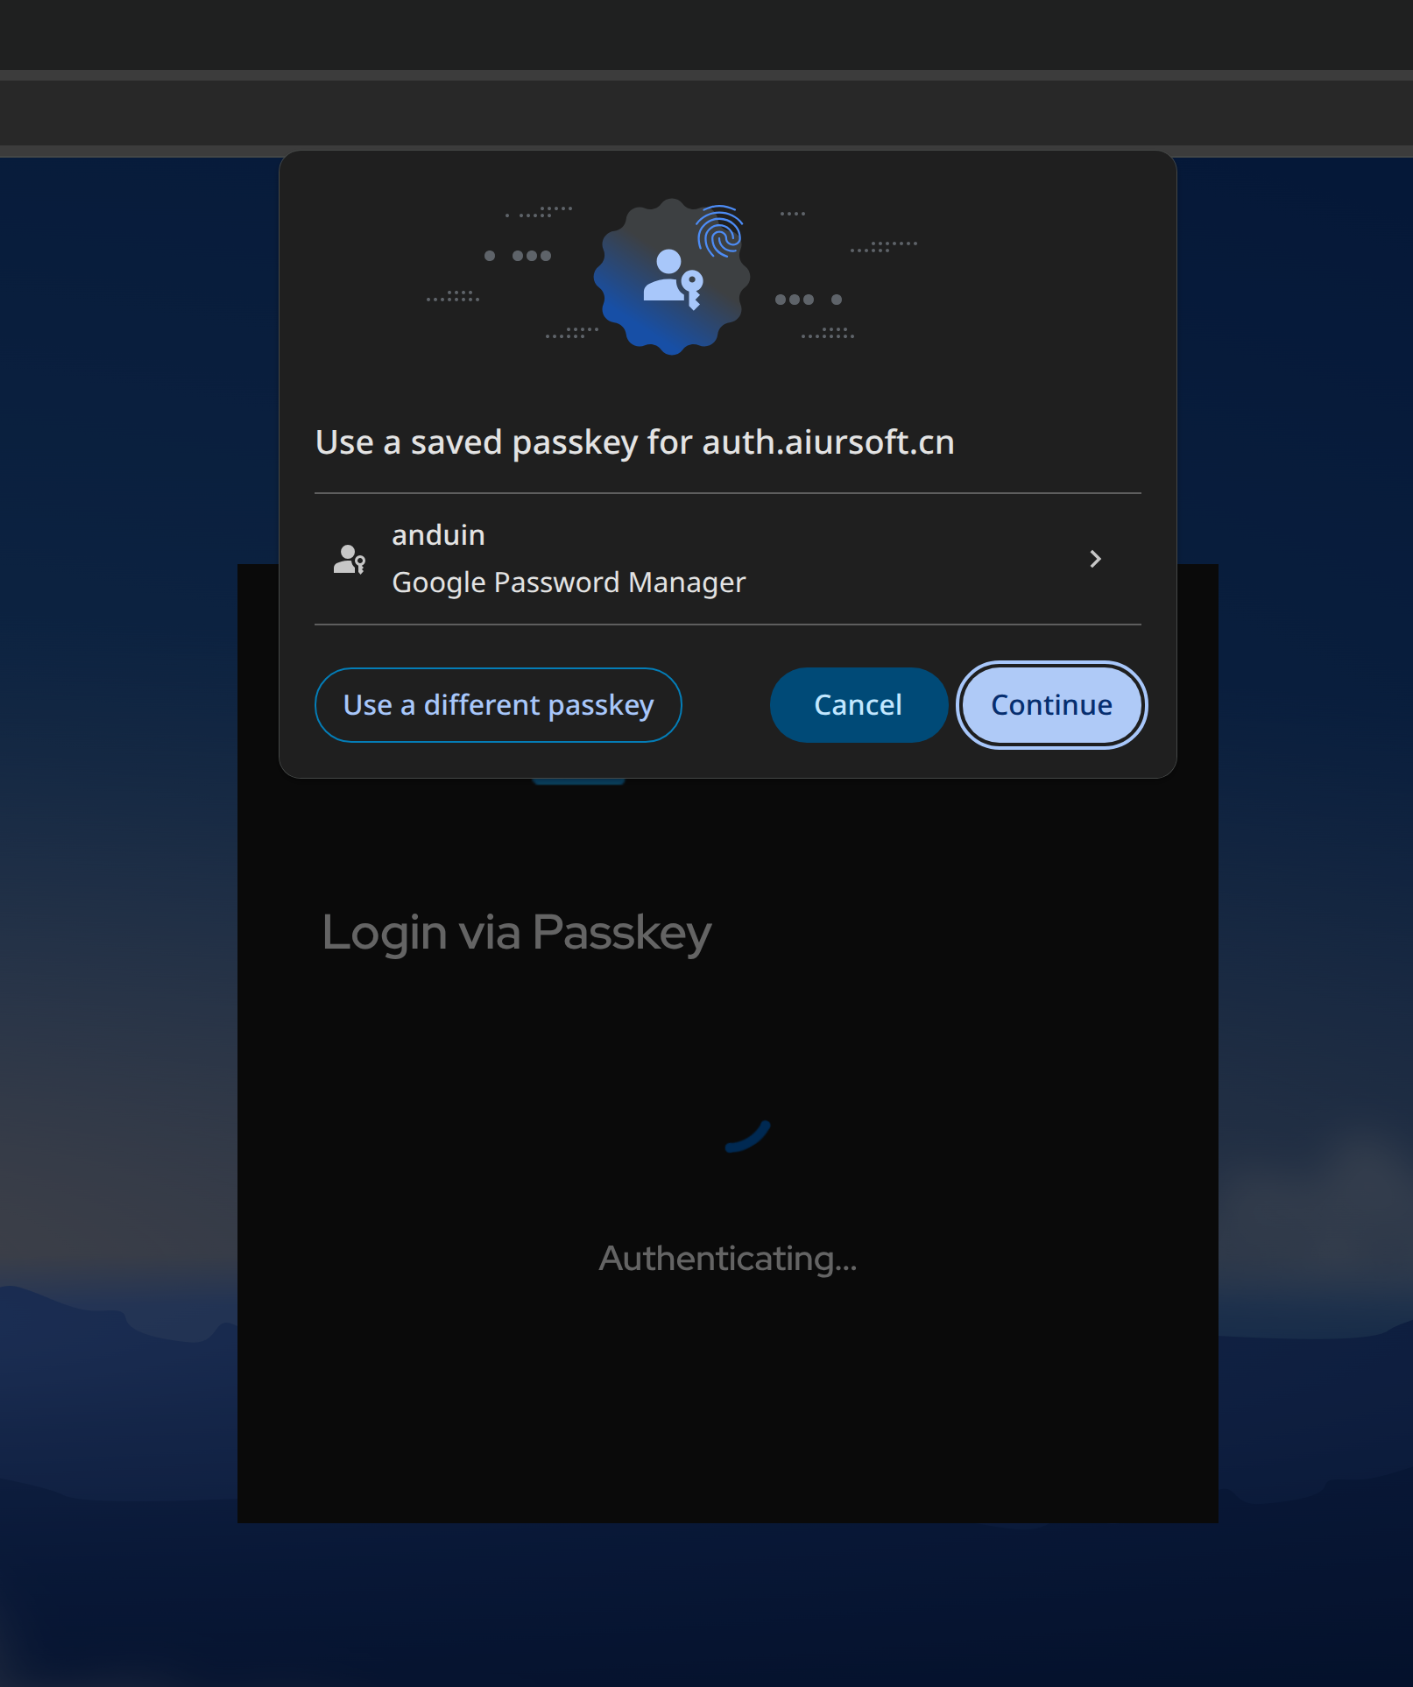
而且,我终于可以使用 Passkey 来登录一切 App 了!安全又方便!
什么应用可以接入?
OIDC
最容易接入的就是已经有OIDC的。可以原生接入。
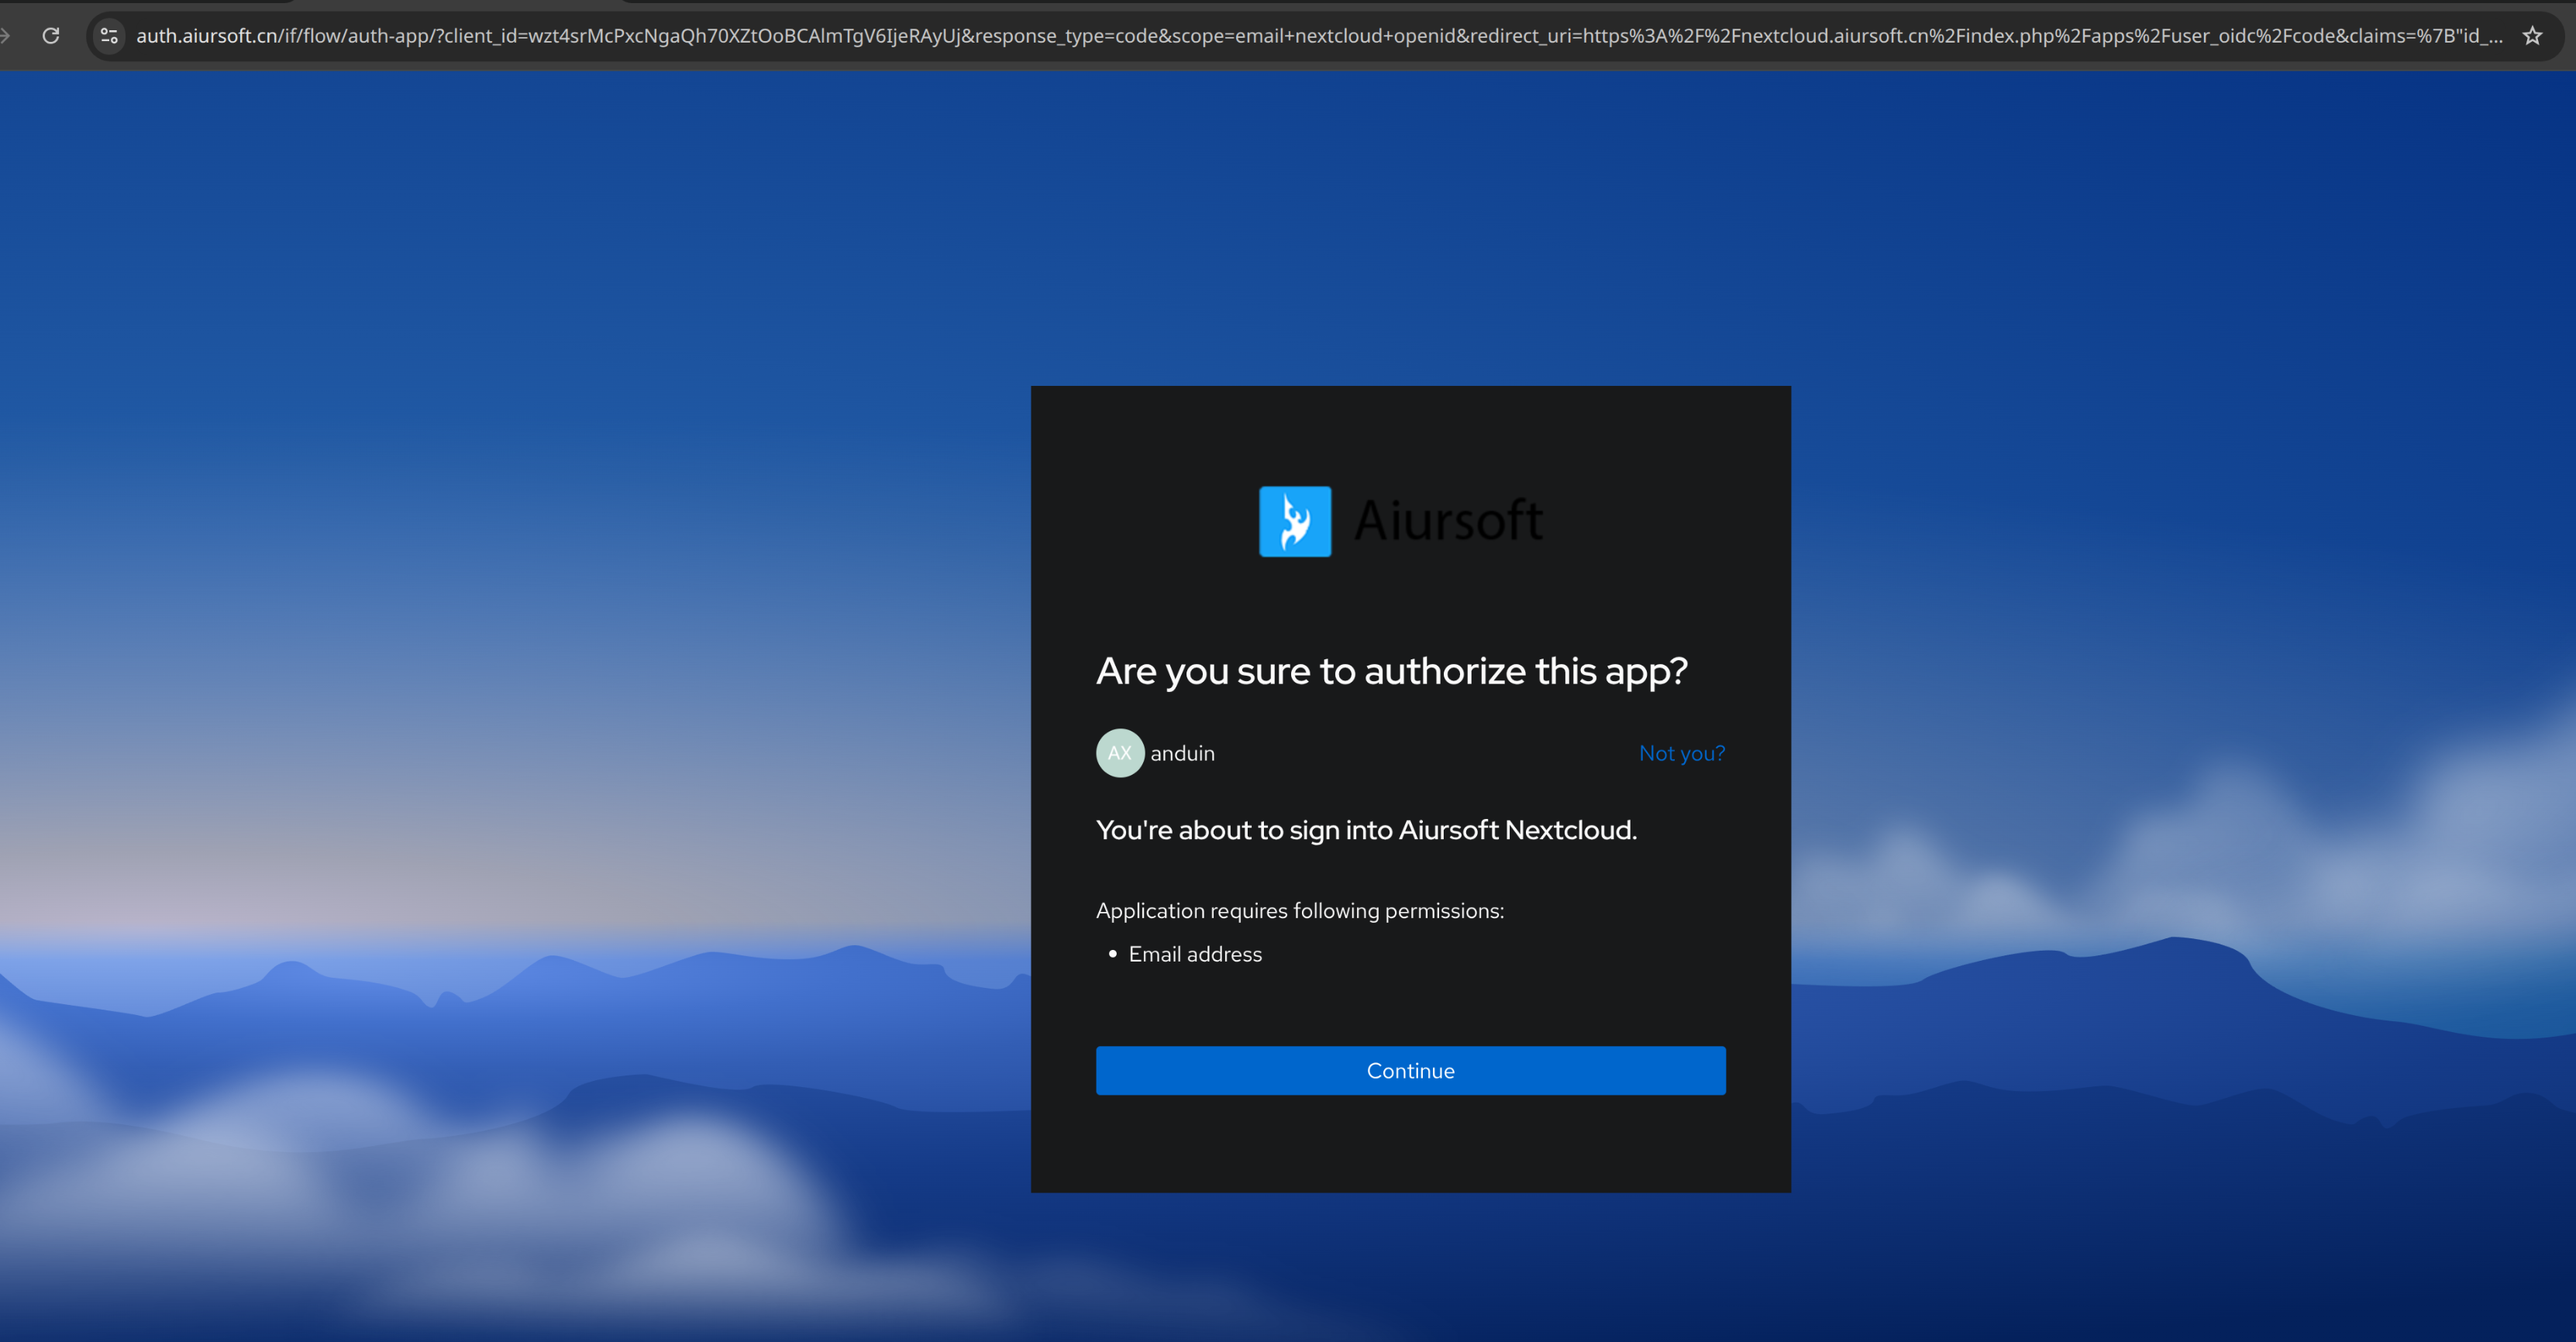
通俗的说 OIDC(OAuth、OpenID Connect),就是应用本身不负责身份认证,而是需要认证时,就带用户 302 到 Authentik 上。用户认证完了,会重定向回来,给应用一个 Code。 应用可以携带 Code、AppId、AppSecret 去获取到这个用户的资料。
至于具体应用本身怎么处理,是合并、还是不存在则创建、还是询问用户,甚至存不存数据库里,都是应用自己的业务逻辑决定的。
LDAP
LDAP 仍然是把密码输入给具体的应用的。只是应用在判定密码是否正确的时候,会基于 LDAP 协议访问 Authentik 来查询,并获取到用户的基本信息。
LDAP 虽然没那么轻量好用,但也可以凑和用。
Forward Auth
如果应用什么都不支持,我建议使用 Forward Auth。参考这个图:
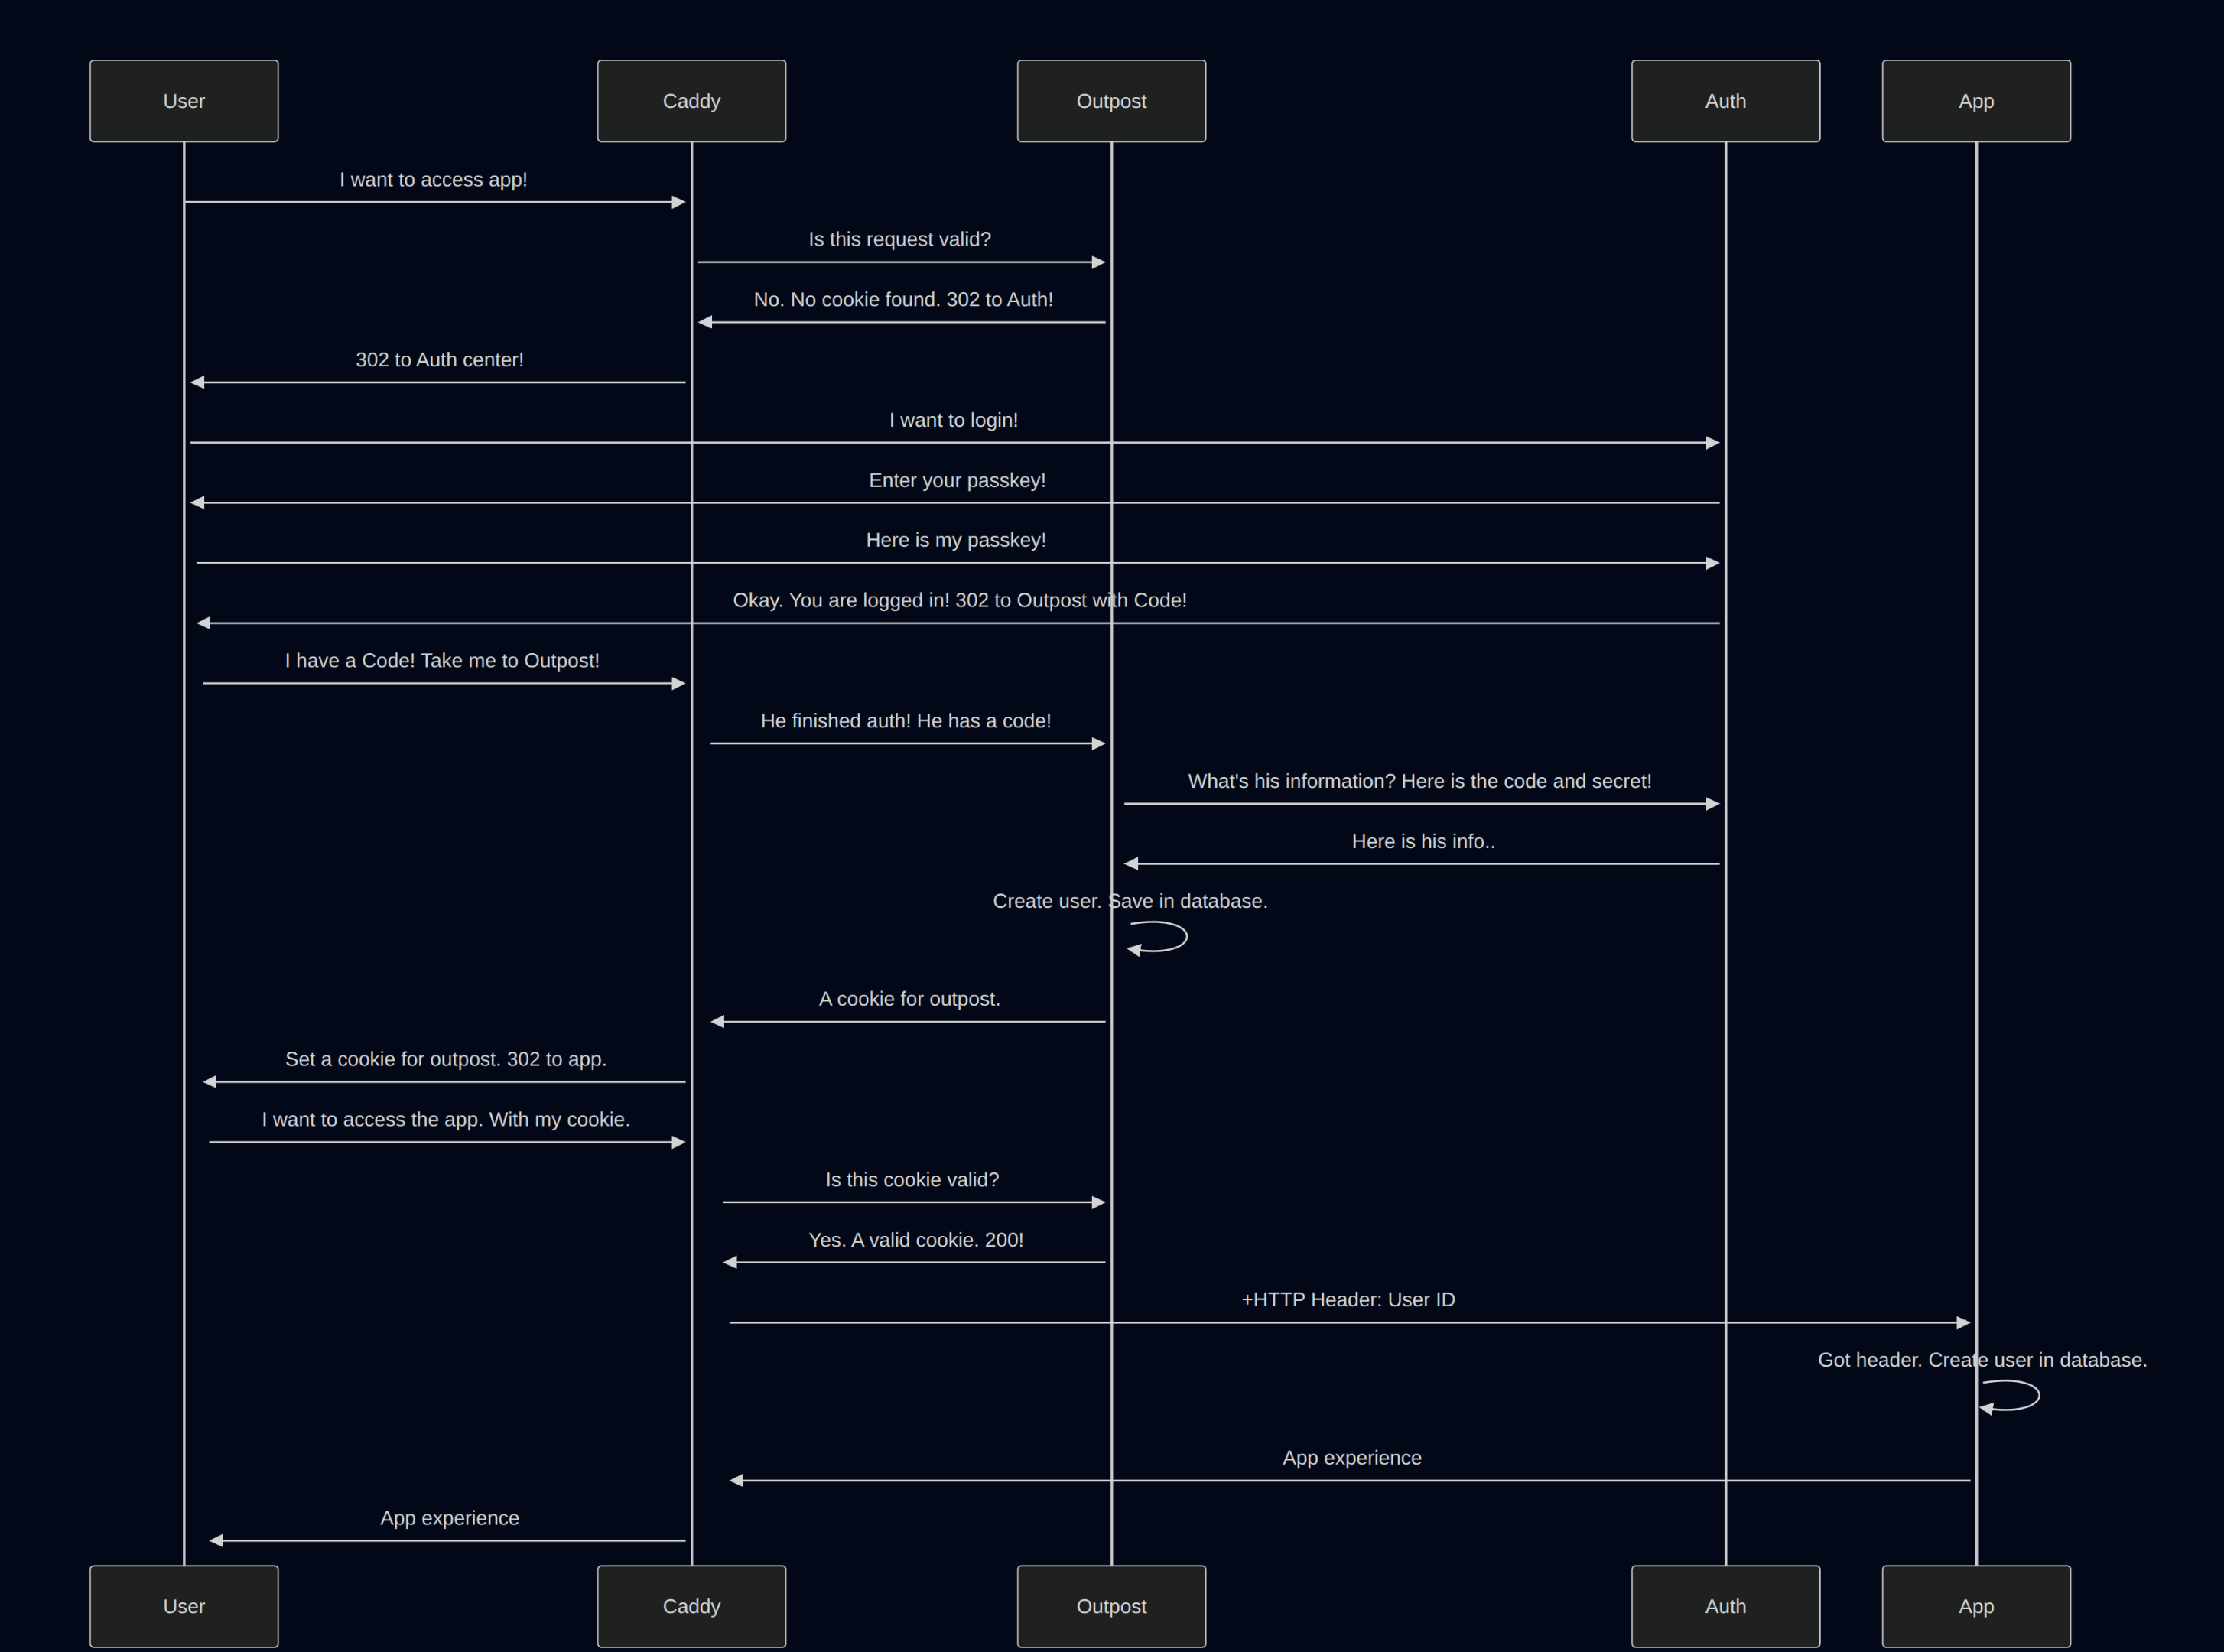
原理就是每个请求来的时候,都先把请求发给门神,问一下门神这个请求合法吗?
门神本身是一个容器,部署在你业务应用的旁边。是 Authentik 提供的容器。
如果合法就反代,如果不合法就听门神的。门神会送用户 302 到 Openid 这条路。
Forward Auth 我使用的是 Caddy 作为反代,其配置首先需要跑一个门神,门神旁边跑具体的业务应用。门神负责和 Authentik 沟通。业务应用是无感的,只是在最终认证成功后,得到一个 HTTP 头。这基本上是万金油的方案,什么应用都能接。
version: '3.9'

services:
  authentik_proxy:
    image: hub.aiursoft.cn/ghcr.io/goauthentik/proxy:2025.6
    environment:
      AUTHENTIK_HOST: "https://auth.aiursoft.cn/"
      AUTHENTIK_INSECURE: "false"
      AUTHENTIK_TOKEN: "{{KOEL_OUTPOST_TOKEN}}"
    networks:
      - proxy_app
      - internal

  koel:
    image: hub.aiursoft.cn/phanan/koel
    volumes:
      - music:/music
      - artifacts:/artifacts
      - covers:/var/www/html/public/img/covers
      - search_index:/var/www/html/storage/search-indexes
      - /swarm-vol/koel/config:/var/www/html/.env # This is a single file, not a directory
    networks:
      - internal
      - proxy_app
# Now we have koel_koel:80
# And we have koel_authentik_proxy:9000

# Protected by Authentik
musics.aiursoft.cn {
    log
    import hsts
    import rate_limit
    header -content-security-policy
    header -x-frame-options
    encode br gzip

    #Use Authentik for forward auth
    route {
        reverse_proxy /manifest.json http://koel_koel:80

        reverse_proxy /outpost.goauthentik.io/* http://koel_authentik_proxy:9000 {
            header_up Host {http.reverse_proxy.upstream.host}
        }

        forward_auth http://koel_authentik_proxy:9000 {
            uri     /outpost.goauthentik.io/auth/caddy
            copy_headers X-Authentik-Username X-Authentik-Groups X-Authentik-Entitlements X-Authentik-Email X-Authentik-Name X-Authentik-Uid X-Authentik-Jwt X-Authentik-Meta-Jwks X-Authentik-Meta-Outpost X-Authentik-Meta-Provider X-Authentik-Meta-App X-Authentik-Meta-Version
        }

        reverse_proxy http://koel_koel:80
    }
}
反代
最笨的方法就是反代。也是最万金油的方案。如果你无法使用 Caddy,你就只能让门神来反代你的应用了。门神会帮你处理身份认证。
这种方法容易让门神形成性能瓶颈。毕竟应用吞吐的所有东西都要额外经过门神。但好处就是什么场景都支持,什么应用都支持。
记忆口诀
考虑到我有大批需要配置的应用,我不得不先写了个口诀,记忆一下它们的配置方法,整理成文档,再开始配。
因为我很多应用已经有大量用户正在使用了,这非常麻烦,需要谨慎的处理用户合并。不同应用对于合并的策略不同,例如gitea是询问用户怎么合并,gist是直接500错误,gitlab是直接按email地址相同就合并,nextcloud是按用户名相同就合并(需要额外配置)等等。非常麻烦。
口诀如下:
未登录、已登录、管理员

* 协议名称
* 传参方式
* 权限继承方式
  * 开启角色管理
  * 管理员组开启
  * 角色信息字段
  * 禁止登录框
* 合并用户方式
* 注销行为
我自己开发的 ASP.NET Core App
对于我自己开发的 ASP.NET Core App,自然是最容易的。毕竟代码就在我手里,我想怎么实现都不会中坑。
一般的,我把配置存在 appsettings.json 里:
{
  "AppSettings": {
    // 可选值为 "Local" 或 "OIDC"
    "AuthProvider": "Local"
  },
  "OIDC": {
    "Authority": "https://your-oidc-provider.com",
    "ClientId": "your-client-id",
    "ClientSecret": "your-client-secret"
  },
}
然后在启动的时候消费这些配置即可。这里,我还使用 mediator 发布一个事件。
        var authProvider = configuration.GetValue<string>("AppSettings:AuthProvider");

        if (authProvider == "OIDC")
        {
            services.AddAuthentication(options =>
                {
                    options.DefaultScheme = CookieAuthenticationDefaults.AuthenticationScheme;
                    options.DefaultChallengeScheme = OpenIdConnectDefaults.AuthenticationScheme;
                })
                .AddCookie(CookieAuthenticationDefaults.AuthenticationScheme, options =>
                {
                    options.LoginPath = "/SignIn";
                    options.LogoutPath = "/auth/signout";
                })
                .AddOpenIdConnect(OpenIdConnectDefaults.AuthenticationScheme, options =>
                {
                    var oidcConfig = configuration.GetSection("OIDC");

                    options.Authority = oidcConfig["Authority"];
                    options.ClientId = oidcConfig["ClientId"];
                    options.ClientSecret = oidcConfig["ClientSecret"];
                    options.Scope.Clear();
                    options.Scope.Add("openid");
                    options.Scope.Add("profile");
                    options.Scope.Add("email");

                    options.SignInScheme = CookieAuthenticationDefaults.AuthenticationScheme;
                    options.ResponseType = OpenIdConnectResponseType.Code;

                    options.SaveTokens = true;
                    options.GetClaimsFromUserInfoEndpoint = true;
                    options.MapInboundClaims = false;
                    options.TokenValidationParameters.NameClaimType = JwtRegisteredClaimNames.Name;
                    options.TokenValidationParameters.RoleClaimType = "groups";
                    options.Events = new OpenIdConnectEvents
                    {
                        OnTokenValidated = async context =>
                        {
                            var mediator = context.HttpContext.RequestServices.GetRequiredService<IMediator>();
                            Console.WriteLine("OnTokenValidated. Got claims:");
                            foreach (var c in context.Principal!.Claims)
                            {
                                Console.WriteLine($"  {c.Type} => {c.Value}");
                            }

                            // 从OIDC的claims中提取关键信息
                            var name = context.Principal!.FindFirst(JwtRegisteredClaimNames.Name)?.Value
                                       ?? context.Principal!.FindFirst("name")?.Value;

                            if (string.IsNullOrEmpty(name))
                            {
                                context.Fail("Name claim not found in OIDC token.");
                                return;
                            }

                            // 创建或同步用户,并获取本地用户的UID
                            var uid = await mediator.Send(new OidcUserSyncCommand(name));

                            // 清除OIDC的旧claims,添加我们自己的claims
														var identity = (ClaimsIdentity)context.Principal.Identity;
                            identity!.RemoveClaim(identity.FindFirst(ClaimTypes.NameIdentifier)); // 移除OIDC的sub
                            identity.AddClaim(new("uid", uid.ToString()));

      // 我这个应用比较特殊,是单人的博客,只要登录了,我就赋予 Administrator 这个 role。大部分应用不需要
                            identity.AddClaim(new(ClaimTypes.Role, "Administrator"));
                        }
                    };
                });
        }
        else // 默认为 "Local" 认证
        {
            services.AddAuthentication(CookieAuthenticationDefaults.AuthenticationScheme)
                .AddCookie(CookieAuthenticationDefaults.AuthenticationScheme, options =>
                {
                    options.AccessDeniedPath = "/auth/accessdenied";
                    options.LoginPath = "/auth/signin";
                    options.LogoutPath = "/auth/signout";
                });
        }
最后,别忘了,在数据库里不存在这个用户的时候创建他。
// Command: 包含从OIDC获取的必要信息
public record OidcUserSyncCommand(string Username) : IRequest<Guid>;

// Handler: 处理用户同步的核心逻辑
public class OidcUserSyncCommandHandler(IRepository<LocalAccountEntity> repo)
    : IRequestHandler<OidcUserSyncCommand, Guid>
{
    public async Task<Guid> Handle(OidcUserSyncCommand request, CancellationToken ct)
    {
        // OIDC用户我们以Username为唯一标识
        var account = await repo.GetAsync(p => p.Username == request.Username);

        if (account is not null)
        {
            // 用户已存在,直接返回ID
            return account.Id;
        }

        // 用户不存在,创建一个新用户
        var newAccount = new LocalAccountEntity
        {
            Id = Guid.NewGuid(),
            Username = request.Username,
            CreateTimeUtc = DateTime.UtcNow,
            PasswordHash = "OIDC_USER",
            PasswordSalt = string.Empty
        };

        await repo.AddAsync(newAccount, ct);
        return newAccount.Id;
    }
}
这就完事儿了。到时候直接把 OIDC 的 AppId、AppSecret 和 Authority 填到环境变量里,启动就能认证了。
其它 Controller 的代码一行不用改,继续使用 [Authorize] 来保护,使用 User.Identity?.Name 来获取当前用户名即可。
OpenWeb Chat
未登录完全无法使用,已登录可以使用几乎所有功能,管理员可以管理高级设置。
- 基于 OpenId Connect 协议。
- Client ID 和 Client Secret 需要通过环境变量传递给 OpenWeb Chat 服务。
- 基于环境变量继承权限信息。可以将具有特定
group的用户添加到 OpenWeb Chat 的管理员组中。- 基于环境变量
ENABLE_OAUTH_ROLE_MANAGEMENT来确保开启了角色管理功能。 - 基于环境变量
OAUTH_ADMIN_ROLES来指定哪些group的用户可以成为 OpenWeb Chat 的管理员。 - 基于环境变量
OAUTH_ROLES_CLAIM来指定groups这个字段代表用户的角色信息。 - 基于环境变量
ENABLE_LOGIN_FORM=False来禁止 OpenWeb Chat 的登录框。
- 基于环境变量
- 在合并用户时自动根据 Email 进行匹配。
- 注销时只会注销 OpenWeb Chat 的会话,不会影响 Authentik 的会话。
注意:需要额外配置环境变量 ENABLE_OAUTH_SIGNUP=True 来允许 OAuth 完成的用户自动注册 OpenWeb Chat。
注意:需要额外配置环境变量 ENABLE_SIGNUP=False 来让 OpenWeb Chat 禁用注册功能。
Jellyfin
未登录完全无法使用,已登录可以使用几乎所有功能,管理员可以管理高级设置。
- 基于 OpenId Connect 协议。
- Client ID 和 Client Secret 需要通过应用内的插件配置传给 Jellyfin 服务。
- 基于插件的配置继承权限信息。可以将具有特定
group的用户添加到 Jellyfin 的管理员组中。- 基于插件配置
Enable Authorization by Plugin来确保开启了角色管理功能。 - 基于插件配置
Admin Roles:jellyfin-admins来指定哪些group的用户可以成为 Jellyfin 的管理员。 - 基于插件配置
Role Claim:groups来指定groups这个字段代表用户的角色信息。 - 基于 Generic 配置
.manualLoginForm { display: none; }来禁止 Jellyfin 的登录框。
- 基于插件配置
- 在合并用户时自动根据用户名进行匹配。
- 注销时只会注销 Jellyfin 的会话,不会影响 Authentik 的会话。
注意,需要额外配置插件配置 Scheme Override:https 来让 OAuth 正常工作。
注意,需要额外在登录页面注入一段 JavaScript 来使安卓客户端工作:
// 替换为你自己的 Jellyfin OIDC 登录地址
const SSO_AUTH_URL = 'https://media.aiursoft.cn/sso/OID/start/Aiursoft';

// Self-executing function that waits for the document body to be available
(function waitForBody() {
  // If document.body doesn't exist yet, retry in 100ms
  if (!document.body) {
    return setTimeout(waitForBody, 100);
  }

  /**
   * Determines if the current page is a login page by checking multiple indicators
   * @returns {boolean} True if this appears to be a login page
   */
  function isLoginPage() {
    const hash = location.hash.toLowerCase();
    const pathname = location.pathname.toLowerCase();

    // Check for URL patterns that typically indicate login pages
    const hasLoginUrl = (
      hash === '' ||
      hash === '#/' ||
      hash === '#/home' ||
      hash === '#/login' ||
      hash.startsWith('#/login') ||
      pathname.includes('/login')
    );

    // Check for DOM elements that indicate a login form is present
    const hasLoginElements = (
      document.querySelector('input[type="password"]') !== null ||
      document.querySelector('.loginPage') !== null ||
      document.querySelector('#txtUserName') !== null
    );

    return hasLoginUrl || hasLoginElements;
  }

  /**
   * Checks if the current page should be excluded from SSO button insertion
   * These are typically pages where users are already authenticated
   * @returns {boolean} True if this page should be excluded
   */
  function shouldExcludePage() {
    const hash = location.hash.toLowerCase();

    // List of page patterns where we don't want to show the SSO button
    const excludePatterns = [
      '#/dashboard',
      '#/home.html',
      '#/movies',
      '#/tv',
      '#/music',
      '#/livetv',
      '#/search',
      '#/settings',
      '#/wizardstart',
      '#/wizardfinish',
      '#/mypreferencesmenu',
      '#/userprofile'
    ];

    return excludePatterns.some(pattern => hash.startsWith(pattern));
  }

  /**
   * Initializes the OAuth device ID in localStorage if it doesn't exist
   * This is required for Jellyfin native apps to maintain device identification
   */
  function oAuthInitDeviceId() {
    // Only set device ID if it's not already set and we're in a native shell environment
    if (!localStorage.getItem('_deviceId2') && window.NativeShell?.AppHost?.deviceId) {
      localStorage.setItem('_deviceId2', window.NativeShell.AppHost.deviceId());
    }
  }

  /**
   * Creates and inserts the SSO login button into the login page
   * Only runs if we're on a valid login page and the button doesn't already exist
   */
  function insertSSOButton() {
    // Safety check: ensure we're on the right page before proceeding
    if (!isLoginPage() || shouldExcludePage()) return;

    // Try to find a suitable container for the SSO button
    const loginContainer = document.querySelector('.readOnlyContent') ||
                          document.querySelector('form')?.parentNode ||
                          document.querySelector('.loginPage') ||
                          document.querySelector('#loginPage');

    // Exit if no container found or button already exists
    if (!loginContainer || document.querySelector('#custom-sso-button')) return;

    // Skip insertion for Jellyfin Media Player (JMP) as it may have different auth handling
    const isJMP = navigator.userAgent.includes("JellyfinMediaPlayer");
    if (isJMP) return;

    // Create the SSO button element
    const button = document.createElement('button');
    button.id = 'custom-sso-button';
    button.className = 'raised block emby-button button-submit';

    // Style the button to match Jellyfin's design while being visually distinct
    button.style = 'display: flex; align-items: center; justify-content: center; gap: 10px; padding: 12px 20px; font-size: 16px; background-color: #3949ab; color: white; margin-top: 16px;';

    // Add icon and text content
    button.innerHTML = '<span class="material-icons">shield</span><span>Login with SSO</span>';

    // Handle button click - prevent form submission and redirect to SSO
    button.onclick = function (e) {
      e.preventDefault();
      oAuthInitDeviceId(); // Ensure device ID is set before SSO redirect
      window.location.href = SSO_AUTH_URL;
    };

    // Add the button to the login container
    loginContainer.appendChild(button);
  }

  // Initial setup: Check if we should insert the SSO button when script first loads
  if (isLoginPage() && !shouldExcludePage()) {
    // Delay insertion slightly to ensure all page elements are fully loaded
    setTimeout(insertSSOButton, 500);
  }

  // Set up a MutationObserver to watch for dynamic page changes
  // This handles cases where Jellyfin loads content dynamically via JavaScript
  const observer = new MutationObserver(() => {
    if (isLoginPage() && !shouldExcludePage()) {
      // Check if login elements are ready and button hasn't been inserted yet
      const ready = document.querySelector('.readOnlyContent') ||
                   document.querySelector('form') ||
                   document.querySelector('.loginPage');

      if (ready && !document.querySelector('#custom-sso-button')) {
        insertSSOButton();
      }
    }
  });

  // Start observing changes to the entire document body and its children
  observer.observe(document.body, { childList: true, subtree: true });

  // Listen for hash changes (when navigating between pages in Jellyfin's SPA)
  window.addEventListener('hashchange', () => {
    // Small delay to allow page transition to complete
    setTimeout(() => {
      if (isLoginPage() && !shouldExcludePage()) {
        insertSSOButton();
      }
    }, 300);
  });
})();
使用这个插件可以注入这段 JavaScript:https://github.com/johnpc/jellyfin-plugin-custom-javascript
OpenGist
未登录可以匿名浏览,已登录可以使用几乎所有功能,管理员可以管理高级设置。
- 基于 OpenId Connect 协议。
- Client ID 和 Client Secret 需要通过环境变量传递给 OpenGist 服务。
- 基于环境变量继承权限信息。可以将具有特定
group的用户添加到 OpenGist 的管理员组中。- 默认就开启了角色管理功能。
- 基于环境变量
OG_OIDC_ADMIN_GROUP来指定哪些group的用户可以成为 OpenGist 的管理员。 - 基于环境变量
OG_OIDC_GROUP_CLAIM_NAME来指定groups这个字段代表用户的角色信息。 - 基于应用内置的 OAuth2 配置
Disable login form来禁止 OpenGist 的登录框。
- 无法合并。需要手工删除老用户。我这里直接给所有老用户的用户名加了个
_disabled。 - 注销时只会注销 OpenGist 的会话,不会影响 Authentik 的会话。
注意,需要额外在管理员中心配置 Disable signup 为关,来确保 OAuth 完成的用户可以自动注册 OpenGist。
Gitea
未登录可以匿名浏览,已登录可以使用几乎所有功能,管理员可以管理高级设置。
- 基于 OpenId Connect 协议。
- Client ID 和 Client Secret 需要通过应用内置的 OAuth2 配置传给 Gitea 服务。
- 基于应用内置的 OAuth2 配置继承权限信息。可以将具有特定
group的用户添加到 Gitea 的管理员组中。- 基于应用内置的 OAuth2 配置
Claim name providing group names for this source. (Optional)来确保开启了角色管理功能。 - 基于应用内置的 OAuth2 配置
Group Claim value for administrator users. (Optional - requires claim name above)来指定哪些group的用户可以成为 Gitea 的管理员。 - 基于应用内置的 OAuth2 配置
Claim name providing group names for this source. (Optional)来指定groups这个字段代表用户的角色信息。 - 基于环境变量
ENABLE_PASSWORD_SIGNIN_FORM = false和ENABLE_OPENID_SIGNIN = false来禁止 Gitea 的登录框。
- 基于应用内置的 OAuth2 配置
- 在合并用户时自动根据 Email 进行匹配。
- 注销时只会注销 Gitea 的会话,不会影响 Authentik 的会话。
注意,需要额外配置应用的环境变量:
[service]
REGISTER_EMAIL_CONFIRM = false
ENABLE_NOTIFY_MAIL = false
DISABLE_REGISTRATION = true
ALLOW_ONLY_EXTERNAL_REGISTRATION = true
ENABLE_CAPTCHA = true
CAPTCHA_TYPE = image
REQUIRE_SIGNIN_VIEW = false
DEFAULT_KEEP_EMAIL_PRIVATE = false
DEFAULT_ALLOW_CREATE_ORGANIZATION = true
DEFAULT_ENABLE_TIMETRACKING = true
NO_REPLY_ADDRESS = noreply.localhost
ENABLE_PASSWORD_SIGNIN_FORM = false
ENABLE_PASSKEY_AUTHENTICATION = false

[lfs]
PATH = /data/git/lfs

[mailer]
ENABLED = false

[openid]
ENABLE_OPENID_SIGNIN = false
ENABLE_OPENID_SIGNUP = false

[oauth2_client]
ENABLE_AUTO_REGISTRATION = true
ENABLE_AUTO_REGISTRATION = true
ACCOUNT_LINKING = auto
来实现匿名可以浏览、注册无需确认、注册无需邮件通知、禁止注册、禁止密码登录、禁止外部 OpenID 登录、禁止外部 OAuth 登录、自动注册 OAuth 完成的用户、自动合并 OAuth 完成的用户。
Koel
完全不支持 OIDC,全靠 Forward Auth 来保护。
sequenceDiagram
    User->>+Caddy: I want to access app!
    Caddy->>+Outpost: Is this request valid?
    Outpost->>+Caddy: No. No cookie found. 302 to Auth!
    Caddy->>+User: 302 to Auth center!
    User->>+Auth: I want to login!
    Auth->>+User: Enter your passkey!
    User->>+Auth: Here is my passkey!
    Auth->>+User: Okay. You are logged in! 302 to Outpost with Code!
    User->>+Caddy: I have a Code! Take me to Outpost!
    Caddy->>+Outpost: He finished auth! He has a code!
    Outpost->>+Auth: What's his information? Here is the code and secret!
    Auth->>+Outpost: Here is his info..
    Outpost->>+Outpost: Create user. Save in database.
    Outpost->>+Caddy: A cookie for outpost.
    Caddy->>+User: Set a cookie for outpost. 302 to app.
    User->>+Caddy: I want to access the app. With my cookie.
    Caddy->>+Outpost: Is this cookie valid?
    Outpost->>+Caddy: Yes. A valid cookie. 200!
    Caddy->>+App: +HTTP Header: User ID
    App->>+App: Got header. Create user in database.
    App->>+Caddy: App experience
    Caddy->>+User:App experience
未登录完全无法使用,已登录可以使用几乎所有功能。
- 基于 Forward Auth 协议。
- 通过 Caddy 的 Forward Auth 模块来验证用户身份。
- Koel 会基于 IP 地址来确保只有来自 Caddy 的请求才会被接受。
- Koel 自己会通过 HTTP Header 来获取用户信息。
- 不支持权限管理。所有人都是 User 角色。
- 不支持合并用户。需要手工删除老用户。
- 注销时只会注销 Koel 的会话,不会影响 Authentik 的会话。
注意,需要额外配置应用的环境变量:
PROXY_AUTH_ENABLED=true
PROXY_AUTH_ALLOW_LIST=0.0.0.0/0,::/0 # Actual IP of Caddy
PROXY_AUTH_USER_HEADER=X-Authentik-Uid
PROXY_AUTH_PREFERRED_NAME_HEADER=X-Authentik-Username
GitLab
未登录可以匿名浏览,已登录可以使用几乎所有功能,管理员可以管理高级设置。
- 基于 OpenId Connect 协议。
- Client ID 和 Client Secret 需要通过应用内置的配置文件传给 Gitlab 服务。
- 基于应用内置的配置文件继承权限信息。可以将具有特定
group的用户添加到 Gitlab 的管理员组中。- 默认就开启了角色管理功能。
- 基于应用内置的配置文件
gitlab_rails['omniauth_providers']来指定哪些group的用户可以成为 Gitlab 的管理员。 - 基于应用内置的配置文件
gitlab_rails['omniauth_providers']来指定groups这个字段代表用户的角色信息。 - 基于应用内置的配置文件
gitlab_rails['omniauth_allow_single_sign_on']来禁止 Gitlab 的登录框。
- 在合并用户时自动根据 Email 进行匹配。
- 注销时只会注销 Gitlab 的会话,不会影响 Authentik 的会话。
注意,需要额外配置应用的环境变量:
gitlab_rails['omniauth_allow_single_sign_on'] = ['openid_connect']
gitlab_rails['omniauth_sync_email_from_provider'] = 'openid_connect'
gitlab_rails['omniauth_sync_profile_from_provider'] = ['openid_connect']
gitlab_rails['omniauth_sync_profile_attributes'] = ['email']
gitlab_rails['omniauth_auto_sign_in_with_provider'] = 'openid_connect'
gitlab_rails['omniauth_block_auto_created_users'] = false
# gitlab_rails['omniauth_auto_link_ldap_user'] = false
# gitlab_rails['omniauth_auto_link_saml_user'] = false
gitlab_rails['omniauth_auto_link_user'] = ['openid_connect']
# gitlab_rails['omniauth_external_providers'] = ['twitter', 'google_oauth2']
gitlab_rails['omniauth_allow_bypass_two_factor'] = ['openid_connect']
gitlab_rails['omniauth_providers'] = [
  {
    name: 'openid_connect',
    label: 'Aiursoft Login',
    args: {
      name: 'openid_connect',
      scope: ['openid','profile','email'],
      response_type: 'code',
      issuer: 'https://auth.aiursoft.cn/application/o/gitlab/',
      discovery: true,
      client_auth_method: 'query',
      uid_field: 'preferred_username',
      send_scope_to_token_endpoint: 'true',
      pkce: true,
      client_options: {
        identifier: '<id>',
        secret: '<secret>',
        redirect_uri: 'https://gitlab.aiursoft.cn/users/auth/openid_connect/callback',
        gitlab: {
          groups_attribute: "groups",
          admin_groups: ["gitlab-admins"]
        }
      }
    }
  }
]
Nextcloud
未登录完全无法使用,已登录可以使用几乎所有功能,管理员可以管理高级设置。
- 基于 OpenId Connect 协议。
- Client ID 和 Client Secret 需要通过应用内置的插件配置传给 Nextcloud 服务。
- 基于插件的配置继承权限信息。可以将具有特定特点的用户添加到 Nextcloud 的管理员组中。
- Nextcloud 的角色管理功能非常特殊,只有 groups 里包含
admin的用户才会被认为是管理员。 - 这里可以使用下面的 Python 进行属性映射,确保只有在
nextcloud-admins组的成员会赋予 admin 权限。 - 基于命令
sudo docker exec --user www-data -it nextcloud-aio-nextcloud php occ config:app:set --value=0 user_oidc allow_multiple_user_backends来禁止 Nextcloud 的登录框。
- Nextcloud 的角色管理功能非常特殊,只有 groups 里包含
- 在合并用户时,Nextcloud 只会根据你设置的属性来和现有的 username 进行比对。
- 首先,我们需要统计每个老 Nextcloud 用户的
user_id,然后将其映射到 Autentik 里的用户表的nextcloud_user_id属性上。 - 然后需要增加一个 Property Mapping,将
nextcloud_user_id,映射为给 Nextcloud 看的user_id属性。如果不存在这个属性,则给 Nextcloud 展示username。 - 在 Nextcloud 的
Attribute Mapping中,设置User ID mapping的 mapping 为user_id。 - 在 Nextcloud 的
Attribute Mapping中,设置quota的 mapping 为quota,并在 Authentik 设置默认值为200G。 - 在 Nextcloud 的
Attribute Mapping中,设置Groups的 mapping 为groups。 - 禁止:Nextcloud by default every user will get a unique user ID that is a hashed value of the provider and user ID. This can be turned off but uniqueness of users accross multiple user backends and providers is no longer preserved then.
- 禁止: Nextcloud to keep IDs in plain text, but also preserve uniqueness of them across multiple providers, a prefix with the providers name is added.
- 设置
'allow_local_remote_servers' => true在config.php来允许 Nextcloud 访问 Authentik 的 API。 - 在 Authentik 的 Provider 设置里,Subject Mode 设为 Based on the User's UUID
- 首先,我们需要统计每个老 Nextcloud 用户的
# Extract all groups the user is a member of
groups = [group.name for group in user.ak_groups.all()]

# If the user is in 'nextcloud-admins', remove it and replace with 'admin'
if "nextcloud-admins" in groups:
    groups.remove("nextcloud-admins")
    if "admin" not in groups:
        groups.append("admin")

return {
    "name": request.user.name,
    "groups": groups,
    # Set a quota by using the "nextcloud_quota" property in the user's attributes
    "quota": user.group_attributes().get("nextcloud_quota", "200G"),
    # To connect an existing Nextcloud user, set "nextcloud_user_id" to the Nextcloud username.
    "user_id": user.attributes.get("nextcloud_user_id", str(user.username)),
}
完成上述配置后,用户通过 Authentik 登录 Nextcloud 时,Nextcloud 会使用 nextcloud_user_id 属性来识别用户,并将其映射到 Nextcloud 的用户 ID 上。如果不存在,则会创建一个新的 Nextcloud 用户,并使用 nextcloud_user_id 作为其 ID。
在未给用户设置 nextcloud_user_id 属性的情况下,Nextcloud 会使用 username 作为用户 ID。
总结
给应用接入 OIDC 非常好玩,眼睁睁看着自己的 App 中心里好东西越来越多。而且用户无需反复注册就能打开你的新业务玩,非常无痛。
缺点就是很折腾。很多应用要自己处理属性映射,并且小心的合并真实的用户。大部分情况都需要手工一一检查用户。
建议在业务规模不大的早期,赶紧上 Authentik 。毕竟用户数量200以内都能人工操作。用户多了以后,再加上应用多了,合并起来将非常恐怖。
我就很后悔,Authentik 搭晚了,导致大量用户(他们在不同平台用了不同的Email、Username注册)合并起来非常头痛,还得和他们沟通,一天也就能接入一个app。
有个代码块缩进前冗余太多 有个代码块没有匹配到语言,没有染色
接入OIDC确实能显著提升用户体验,但文章揭示的“便利性与复杂性共生”现象颇具现实意义。以Nextcloud的属性映射为例,通过
nextcloud_user_id字段实现新旧用户映射的方案虽然巧妙,却暴露出中心化认证体系中用户数据碎片化的深层矛盾——当用户在不同平台使用差异化身份标识时,如何构建统一的身份图谱始终是难以绕开的课题。这种“以属性字段为桥梁”的解决方案,本质上仍在依赖人工干预的脆弱链条。在GitLab的配置片段中,
admin_groups与groups_attribute的耦合关系值得玩味。这种将权限管理直接嵌入身份验证协议的设计,虽然简化了系统间的交互层级,但也可能造成安全策略的过度集中。当OIDC成为权限控制的单一入口时,如何在最小化攻击面与灵活授权间取得平衡,或许是更值得探讨的技术哲学问题。值得注意的是,作者多次强调的“手动用户合并”痛点,实际上映射出传统SaaS架构与现代零信任模型的冲突。当每个应用都成为独立的身份源时,用户管理成本呈指数级增长。这或许预示着未来需要更智能的用户生命周期管理系统,比如基于语义网络的身份聚合技术,或引入区块链实现分布式身份验证,从而打破当前“每个应用即一个身份孤岛”的僵局。
文章对Forward Auth模式的描述揭示了另一种可能性——通过反向代理实现认证解耦。Koel案例中Caddy与Outpost的协作机制,某种程度上体现了基础设施层对应用层的赋能。这种“认证下沉”策略若能规模化应用,或许能缓解应用开发者对身份验证系统的依赖焦虑。但这也带来了新的挑战:如何在保持基础设施灵活性的同时,确保认证策略的可审计性和可追溯性?
作者提到的“200用户临界点”颇具启示意义。这不仅是技术选型的分水岭,更是组织架构演变的信号灯。当用户规模突破这一阈值时,单纯依靠人工运维的身份管理系统必然面临效能瓶颈,此时引入自动化工具链(如CI/CD中的身份验证测试、用户生命周期管理的自动化脚本)将成为必然选择。这种从“手动配置”到“系统化工程”的演进路径,或许才是身份验证体系可持续发展的真正命题。