家里的上古的笔记本还是 10代 CPU,跑 Windows 11 卡的要死,跑 Linux 折腾又没有好用的安卓生态和 Google Play。最后干脆跑 Chrome OS 吧!
官方的 Chrome OS Flex 砍了一大堆东西。不妨自己找社区的方案。
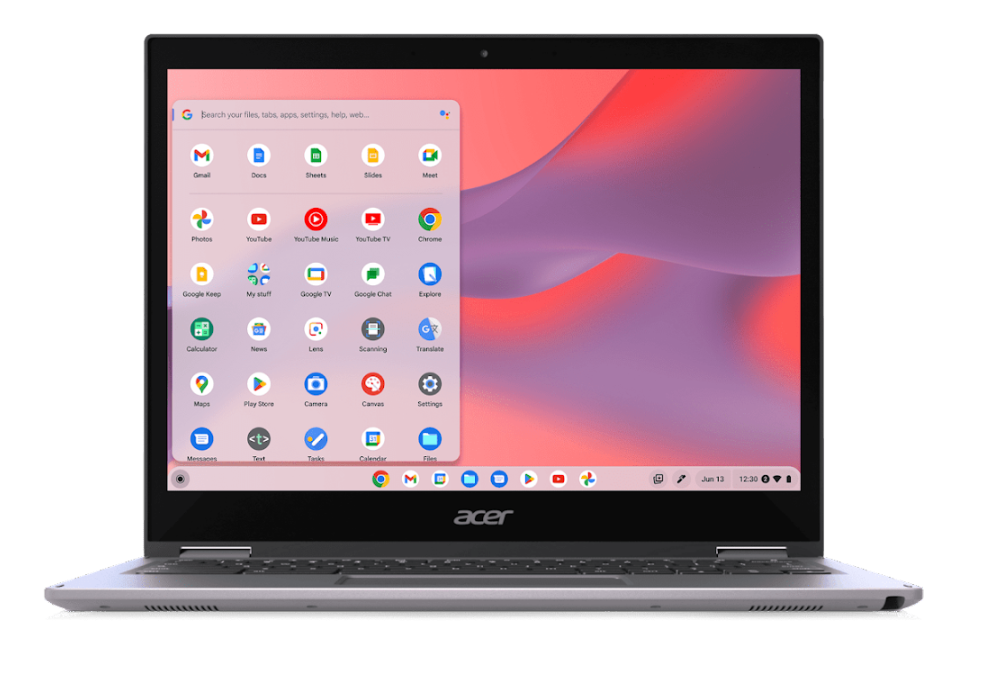
这个教程的目标效果如何?
Chrome OS 本身是 Linux 的深度魔改,虽然它底层用了许多封闭而复杂的技术(例如 A\B分区),以至于它看起来不像是个 Linux,但是它最终提供了非常完美的体验。
Chrome OS 本身凭借容器技术,可以运行 Android 应用程序,也可以部署一个 Debian 的 Linux 容器。这些 Android 应用程序和 Linux 应用程序都可以像正常的应用那样,pin到任务栏、访问剪切板、访问文件系统、访问推送通知、窗口化等,因此就如同它本身可以直接运行一样:
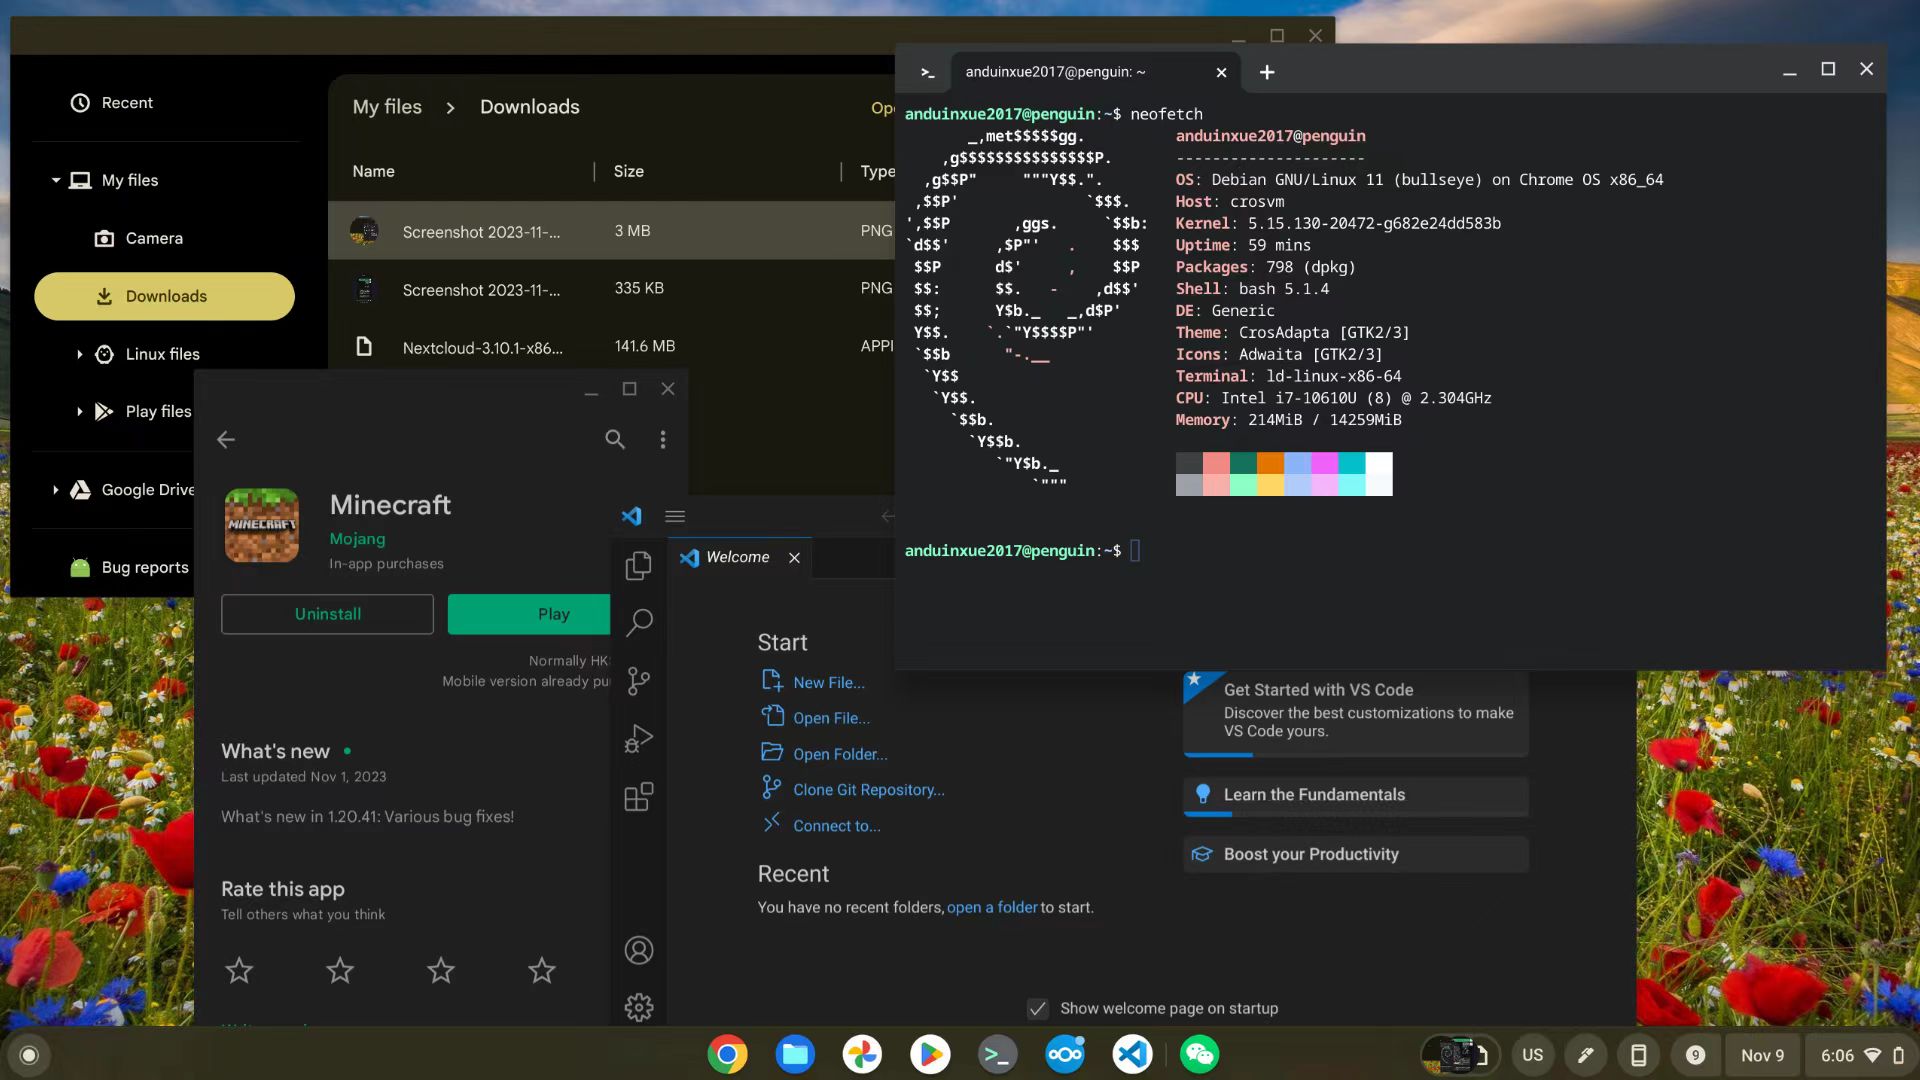
所以只要部署完成,你就拥有了一台:体验超好、可以运行 Android、Linux 应用、动画美丽、比较安全,又几乎很难用坏的设备了。而且整个系统并不怎么吃配置,老旧的设备也可以重焕新生了!
开始之前 - 挑选合适的部署的电脑
我更建议在一个二合一笔记本上安装 Chrome OS。
这个部署方式目前只支持 x86 x64,不支持 ARM。
Chrome OS 是一个 Linux 的魔改,其显示引擎既不是 X11 也不是 Wayland,应该是 freon,所以 Nvidia 的显卡发挥不了什么硬件加速。不要选择带有独显的电脑。
例如我的电脑:Thinkpad X1 Yoga,
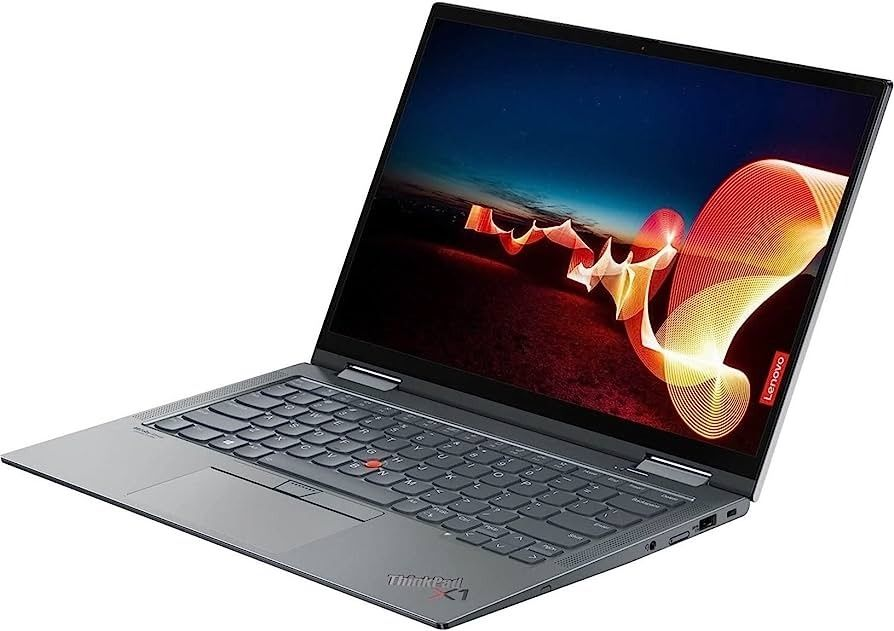
它就是一款 Intel 10 代 i7,没有独显,有触屏,还可以翻转 360 度的笔记本,非常适合拿来跑 Chrome OS!
Chrome OS 对触屏非常友好,并且对二合一设备有平板模式、笔记本模式的切换支持。一般的笔记本的Wifi、蓝牙、音频、触屏、触控板、电源键、手写笔等 Brunch 都有补丁去支持。
确定了你要部署的老电脑以后,拿一个 16GB 的大U盘,就可以开始下面的步骤:魔改 Chrome OS、制作安装U盘、启动 Chrome OS、安装 Chrome OS,然后启动,就拥有了一台不错的 Chrome OS 笔记本啦!
第一步 - 下载 Chrome OS 的恢复映像
这个网站 https://cros.tech/ 提供了 Chrome OS 的恢复映像下载。
但是,要下载,需要你输入一个设备型号。所以你也可以直接点击下面的链接:
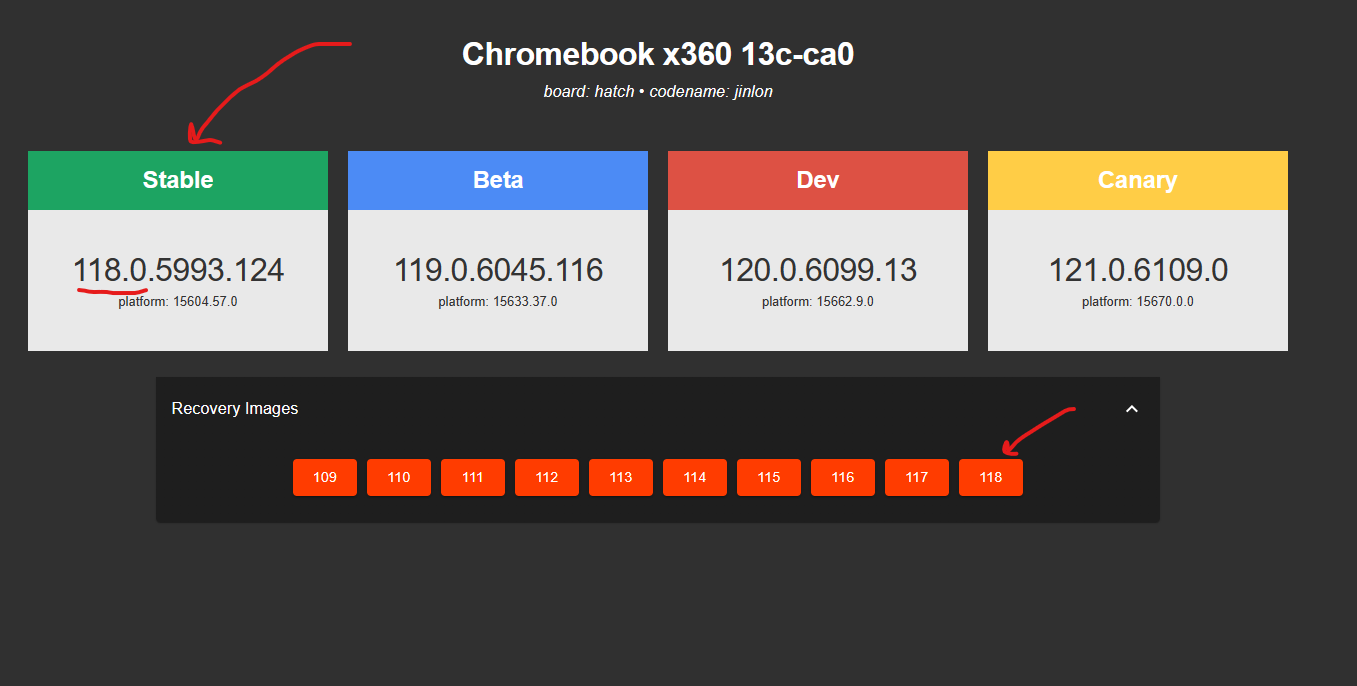
选择稳定版的映像。
第二步 - 下载 Brunch 恢复映像魔改工具
Brunch 魔改了 Chrome OS 的恢复映像,为其兼容了普通 x86 PC 的 UEFI 启动支持,并且制作了图形化的安装界面,还魔改了内核,打了大量补丁,让 Chrome OS 在上古设备上仍然还能再战!
下载 Brunch!
下载时,别忘了对应上 Brunch 和 ChromeOS 的版本。
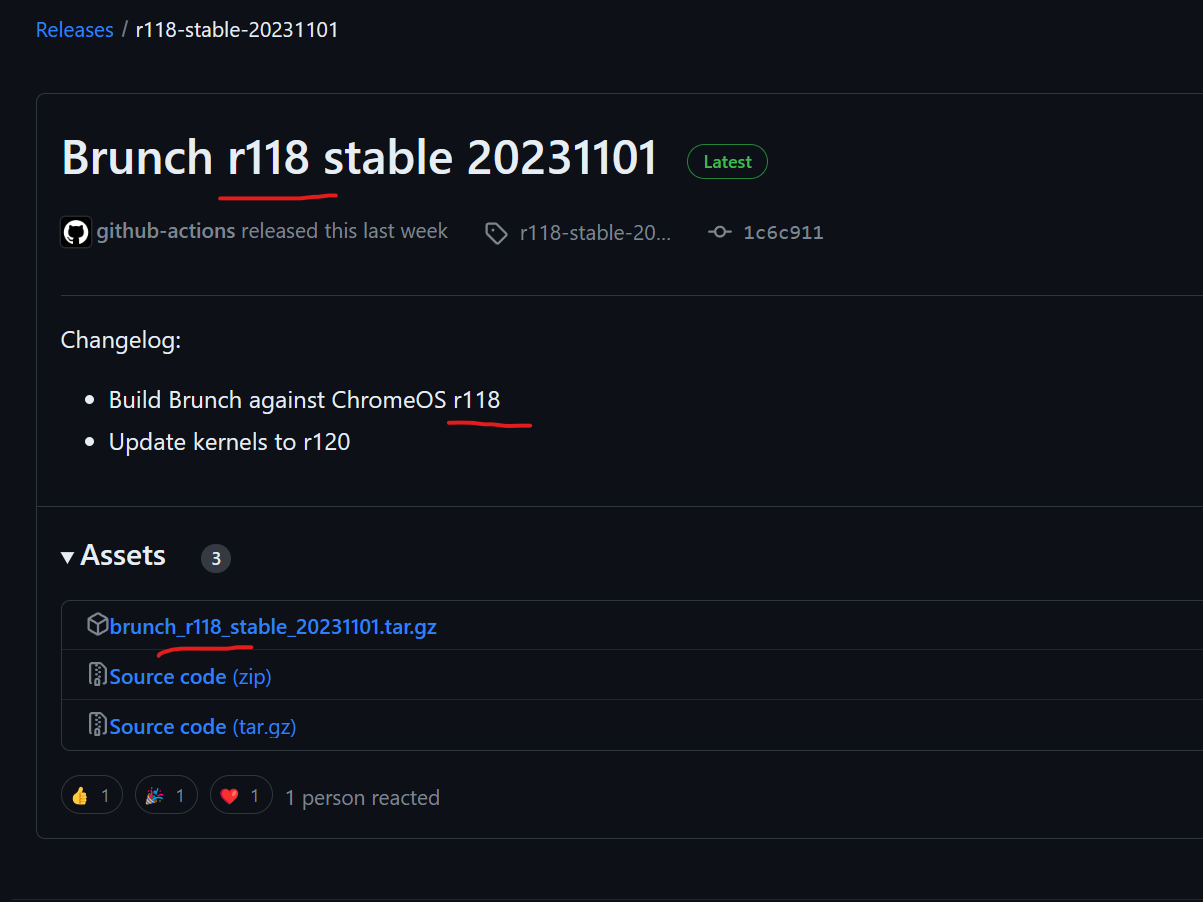
例如,我下载的 Chrome OS 是 118,下载 Brunch 时要找 118 的版本。
第三步 - 全部解压,开始魔改 Chrome OS 的恢复映像
3.1 先将 Brunch 魔改工具 和 Chrome OS 恢复映像全部解压。
3.2 把 Chrome OS 的恢复映像拷到 Brunch 魔改工具下。
此时你会看到目录下有rootc.img,这是 Brunch 的。有 chromeos_15604.57.0_hatch_recovery_stable-channel_mp-v7.bin,这是 Chrome OS:
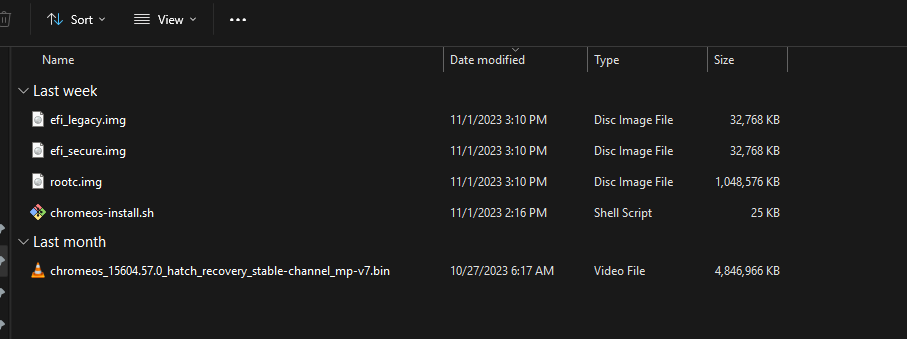
3.3 开始魔改!
由于在公司的电脑上只有 Windows,我只好去使用的是 Linux 子系统,运行 Ubuntu。如果你本来就是 Ubuntu,那么自然不需要这么复杂。
# 如果你没有 pv cgpt tar unzip 等,用 apt 来安装一下:
sudo apt update && sudo apt -y install pv cgpt tar unzip

# 开始运行魔改:
sudo bash ./chromeos-install.sh -src chromeos_15604.57.0_hatch_recovery_stable-channel_mp-v7.bin -dst chromeos.img
注意将上面命令的 chromeos_15604.57.0_hatch_recovery_stable-channel_mp-v7.bin 为你真正的系统恢复文件名称。
运行完成后,将会看到 chromeos.img,这就是魔改完毕,可以烧录安装的映像了!
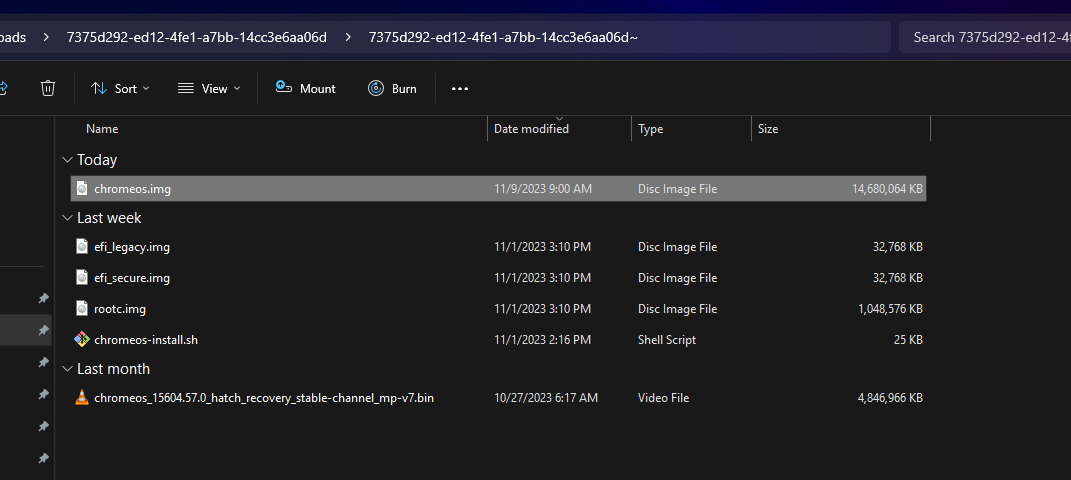
第四步 - 烧录 U盘
由于我的公司的电脑只有 Windows,所以我只能使用 rufus 等工具烧录 U盘。
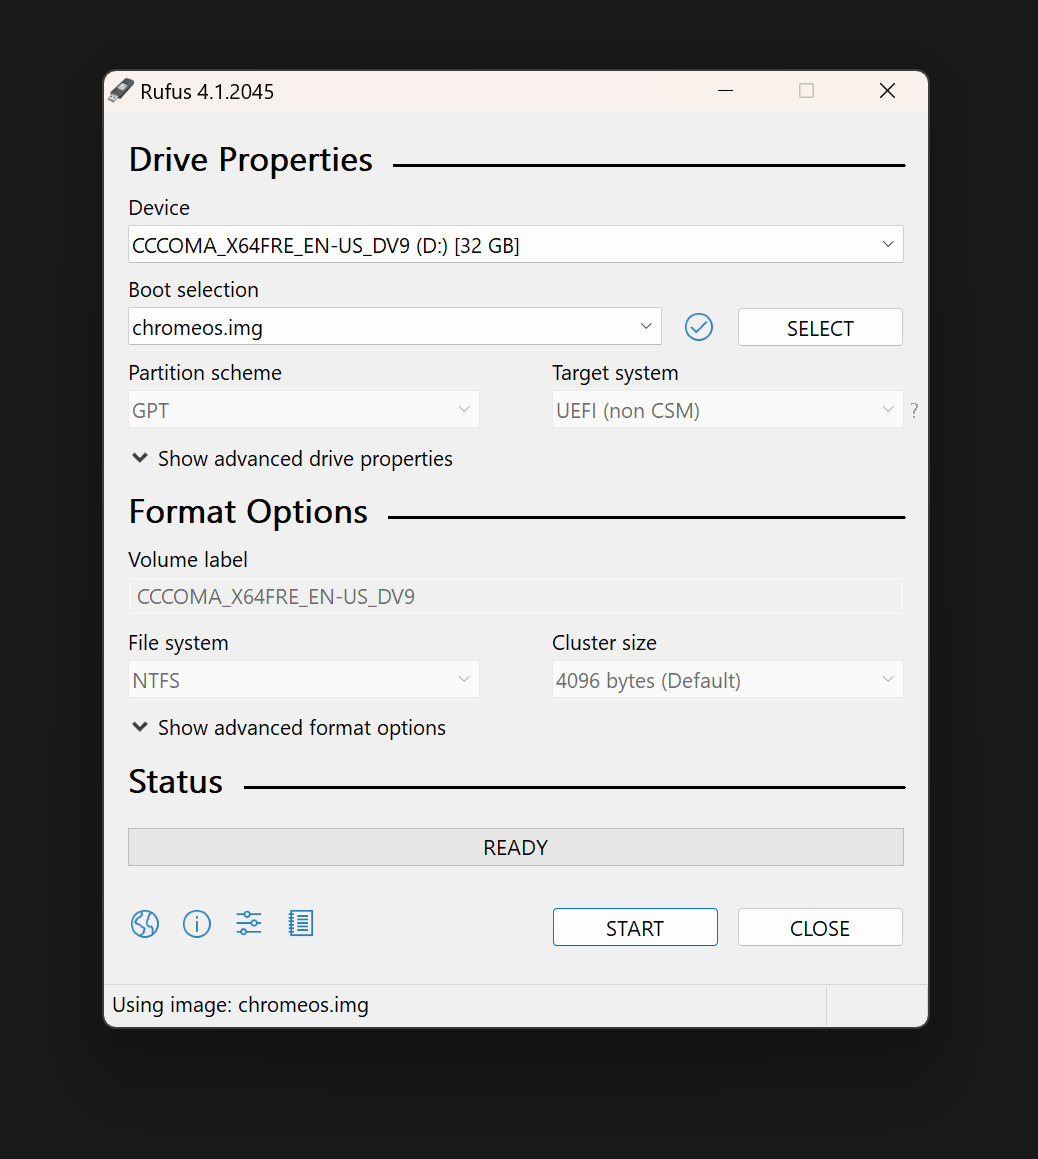
在 Rufus 里选择这个 chromeos.img,选择 U盘,开始烧录即可。这个 img 文件中包含多个分区,Rufus 会非常聪明的理解这件事而直接把整个磁盘结构复制进去。
如果你是 Linux 用户,自然直接使用 dd 去烧录 U盘。
第五步 - 启动 U盘
拿到了系统U盘,剩下的安装过程和安装一个普通的 Linux 没什么两样。这里有一些设置提前在 BIOS 里设置好:
- Modern Standby 打开。(某些 BIOS 叫睡眠模式 S3、S0ix云云……S0ix 是 Modern Standby。Chrome OS 对 S0ix 支持的很好,这可以让你在合上盖子后继续听歌)
- Secure Boot 关闭。(显然我们没有为 Brunch 签名)
- Device Guard 关闭。(未必叫这个名字,某些 BIOS 喜欢用一些额外的安全功能禁止第三方操作系统启动)
然后插好U盘,开机,狂按F12进入启动菜单(不同的设备不一样,可能是 F10,F9,F2,Delete……),选择你的U盘即可。
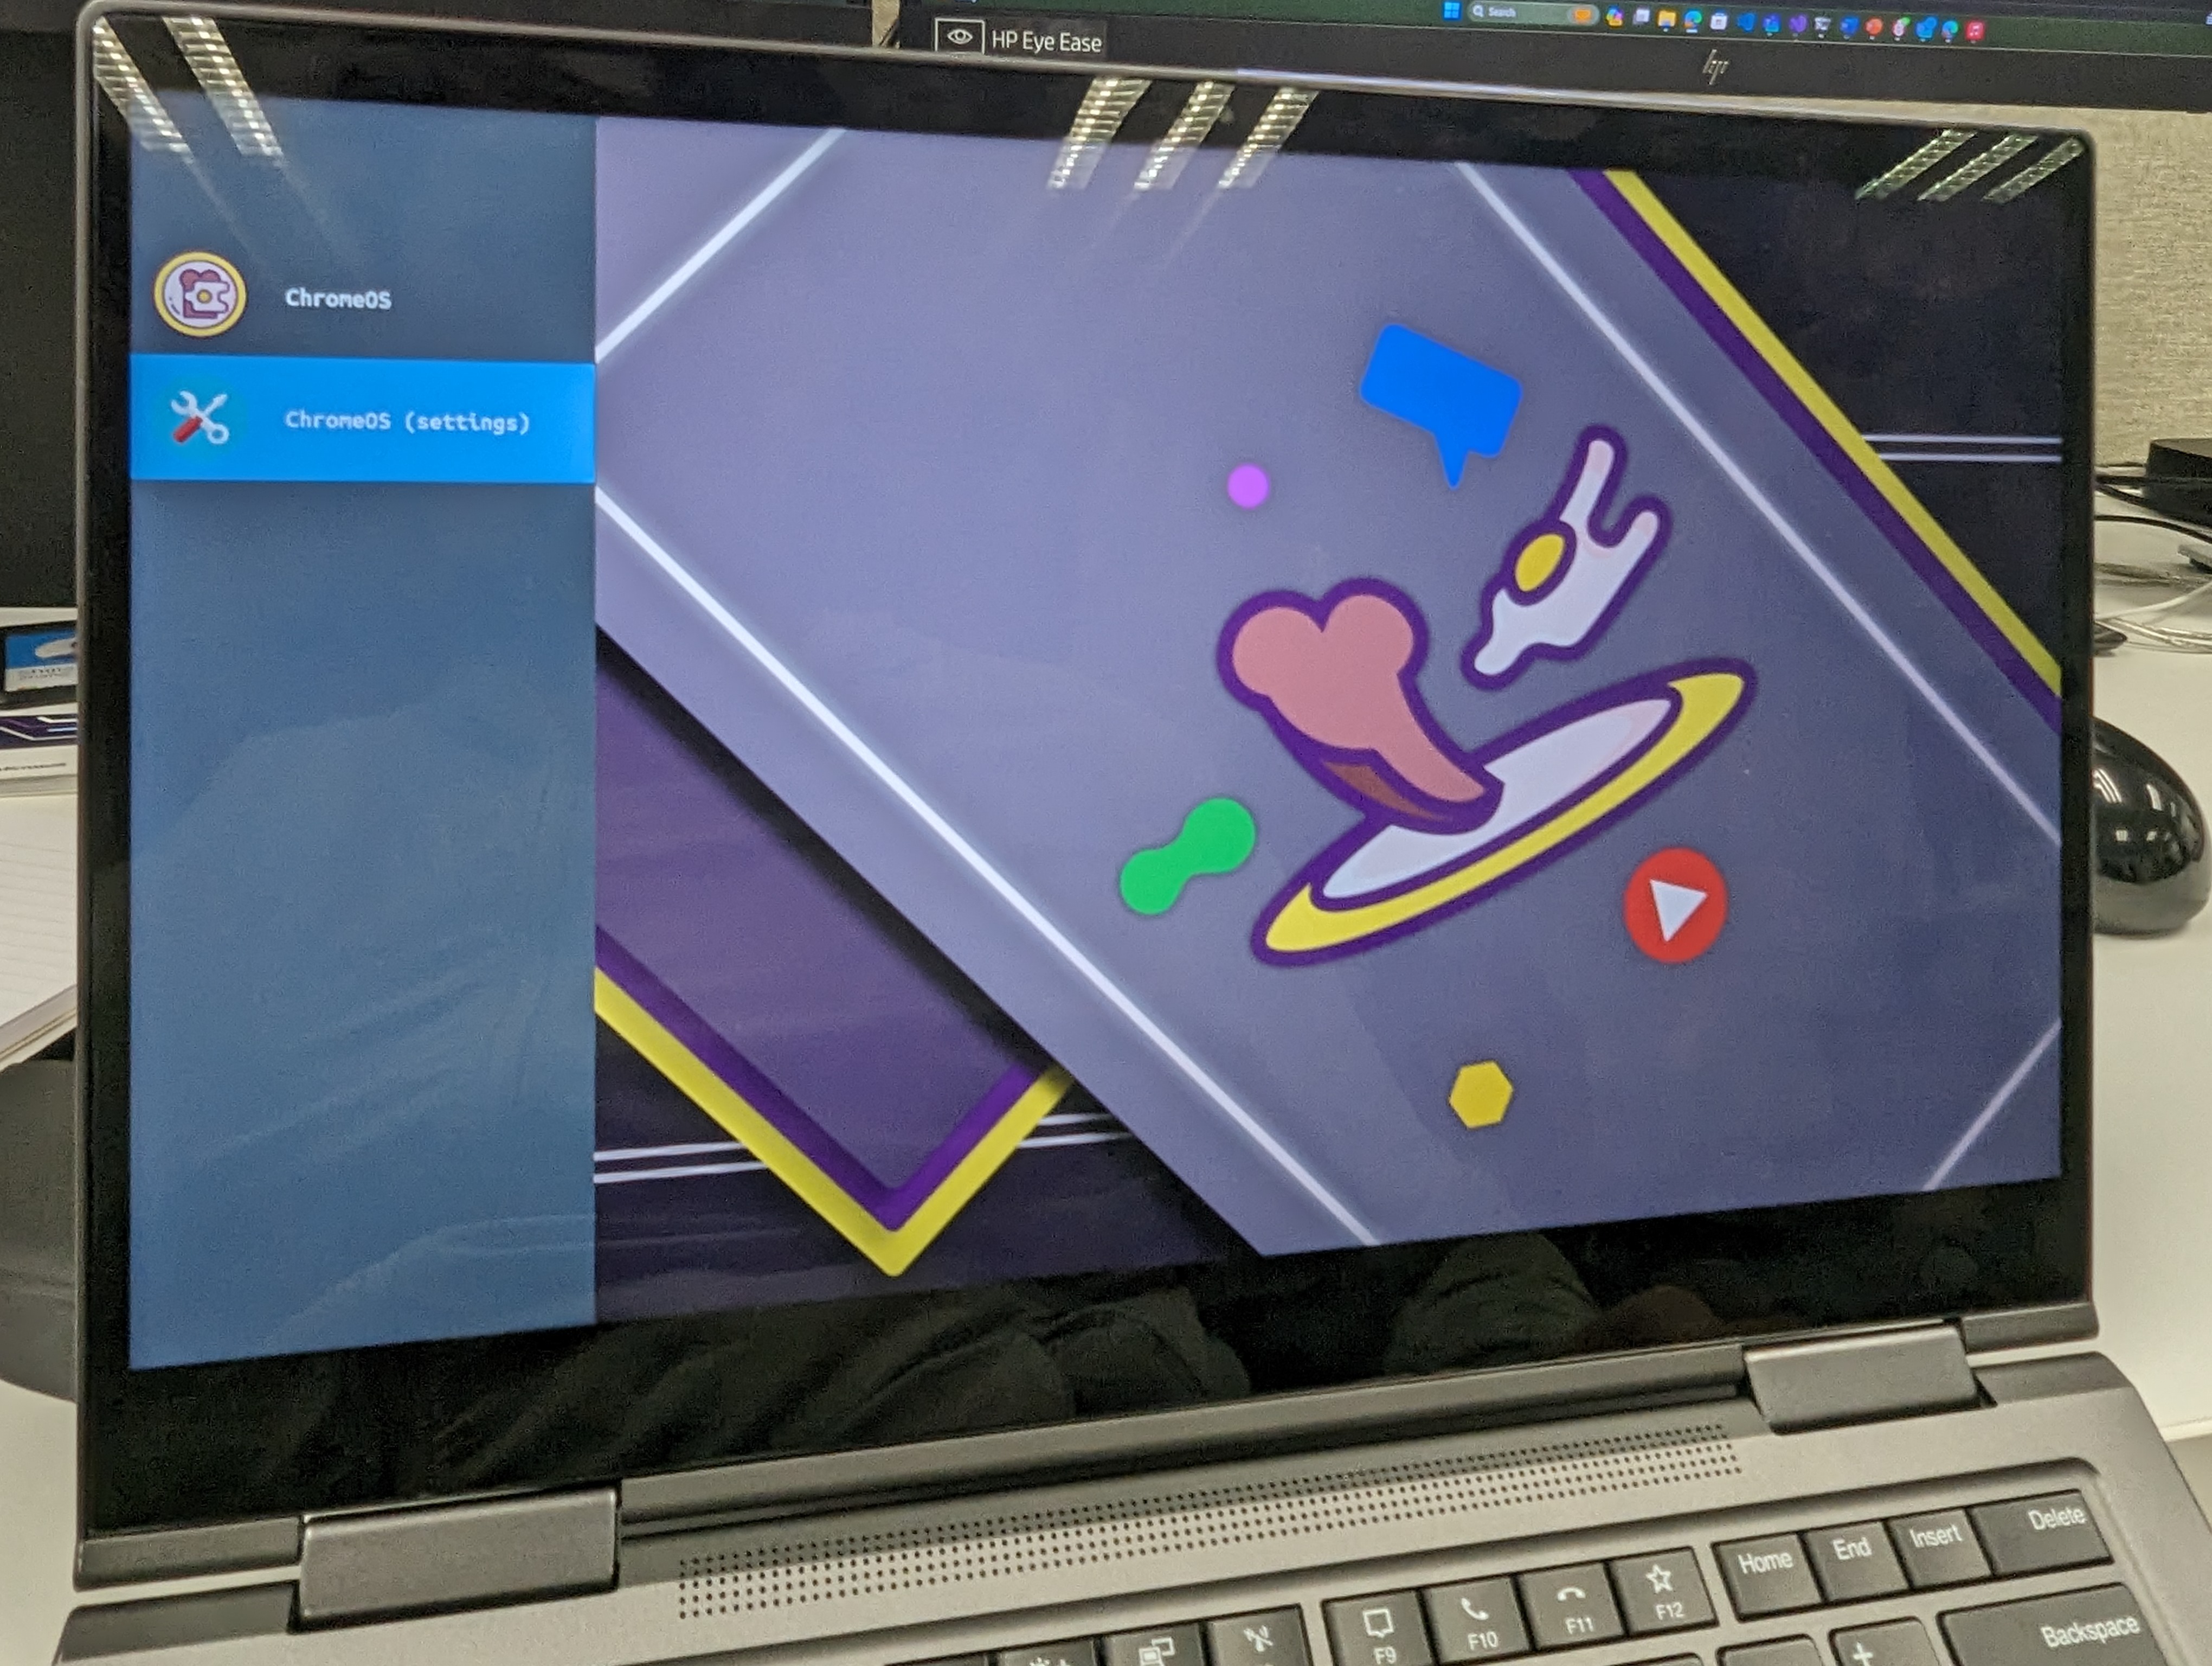
在这里,两项分别是:
- 启动 Chrome OS
- 设置 Chrome OS
注意,Brunch 的本质其实是一个 Chrome OS ToGO,也就是说,当你烧录到U盘里以后,其实它已经是个可以用的系统盘了。选择第二项就是配置这个系统盘。选择第一项,你很快就会启动一个完整的 Chrome OS。
这和大部分 Linux 的安装很类似,安装 Chrome OS 的本质其实是先启动一个已经装好的 Chrome OS(在U盘上),再复制自己到电脑本身的硬盘上。当你安装到硬盘后,你仍然会看到上面两个菜单,所以到时候再配置也不迟。
第六步 - 进入 Chrome OS Live USB
选择第一项后,你的电脑会将 U盘里的内容加载到内存。这个过程非常缓慢,取决于U盘的速度。
在接下来的半个小时里,你只能看到一个这个:
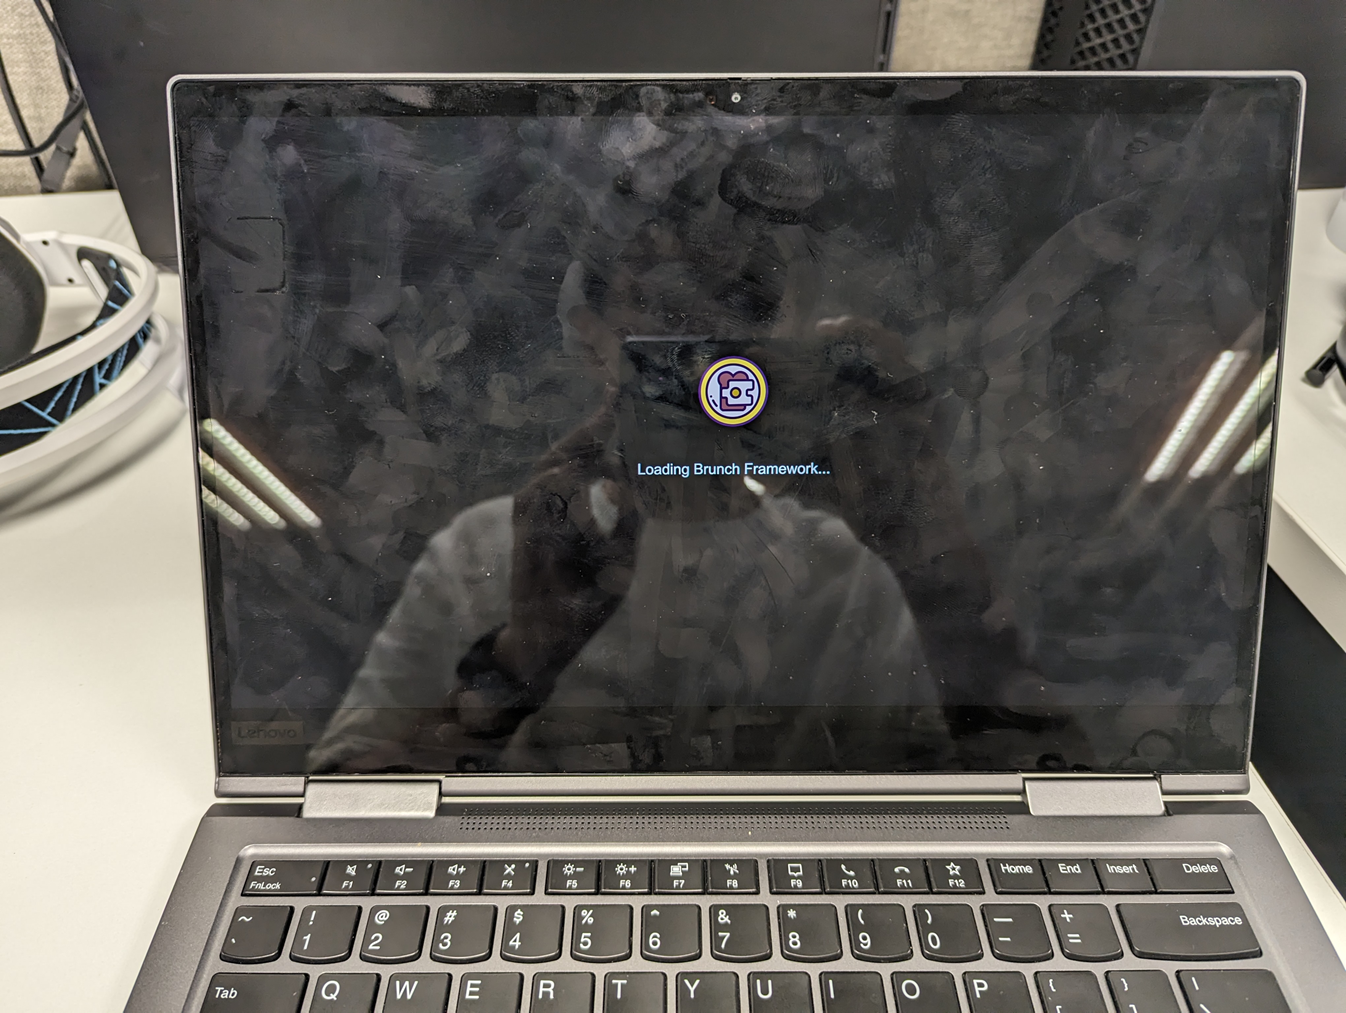
经过非常漫长的等待,你将会看到 Chrome OS 的 OOBE:
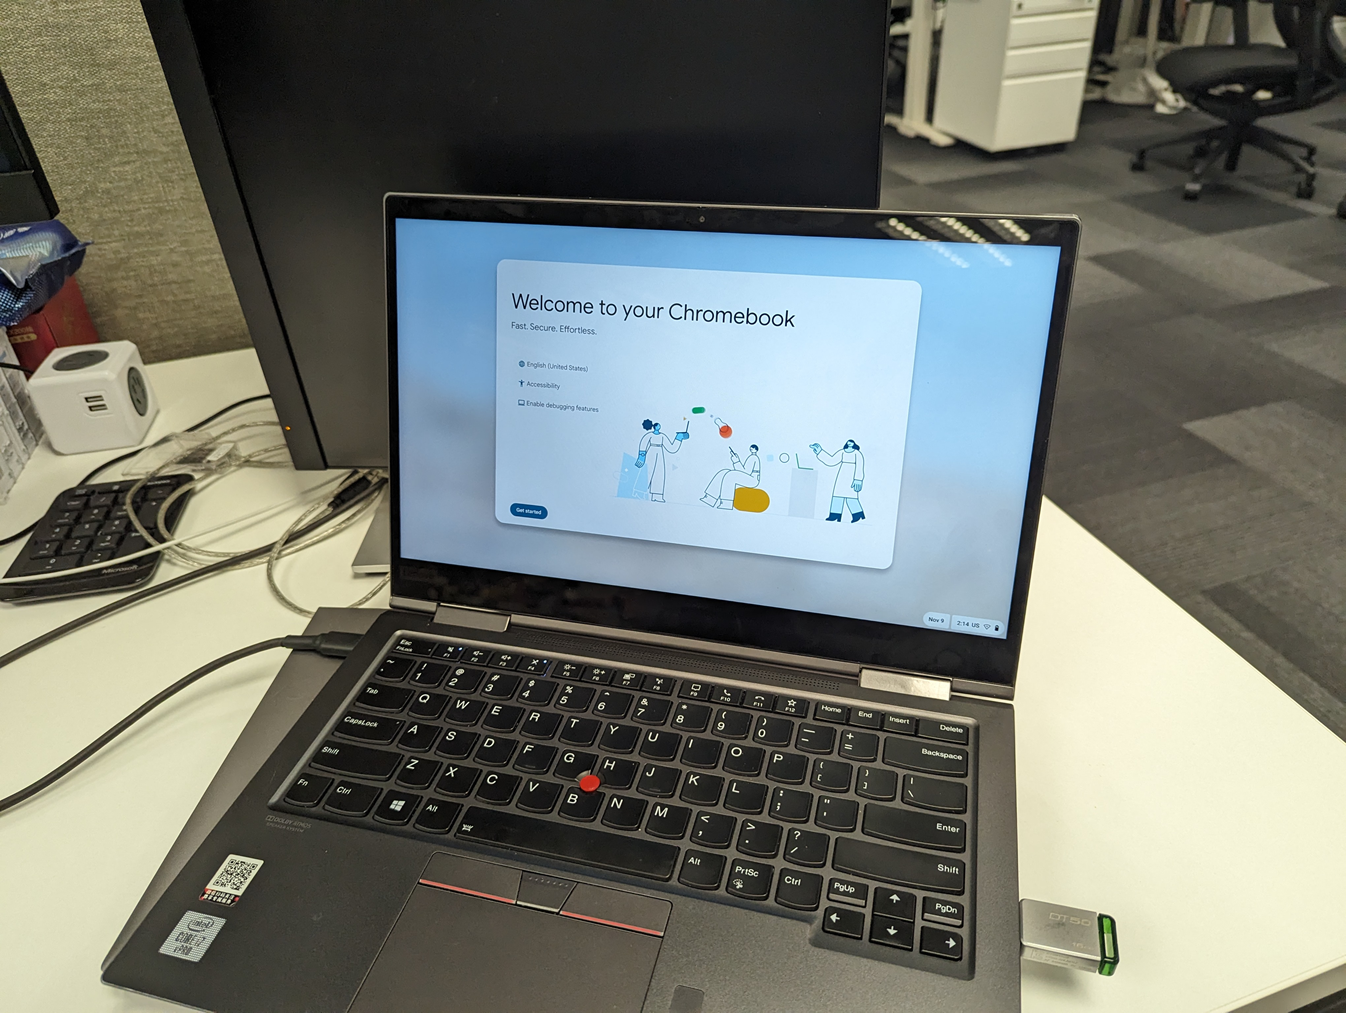
注意:此时 Chrome OS 会看起来很卡,这是因为它是从 U 盘启动的。这个操作系统还并没有安装到你的硬盘上。
第七步 - 将 Chrome OS 部署到本地的硬盘
不要完成 Chrome OS 的开箱指引! 这是因为你启动的本质上是 Live USB 里的 “Chrome OS ToGo”。如果你希望它是个单纯的安装介质,那么在这里登录谷歌没有意义。
在欢迎页面按下:Ctrl + Alt + F2。这会进入 TTY2。
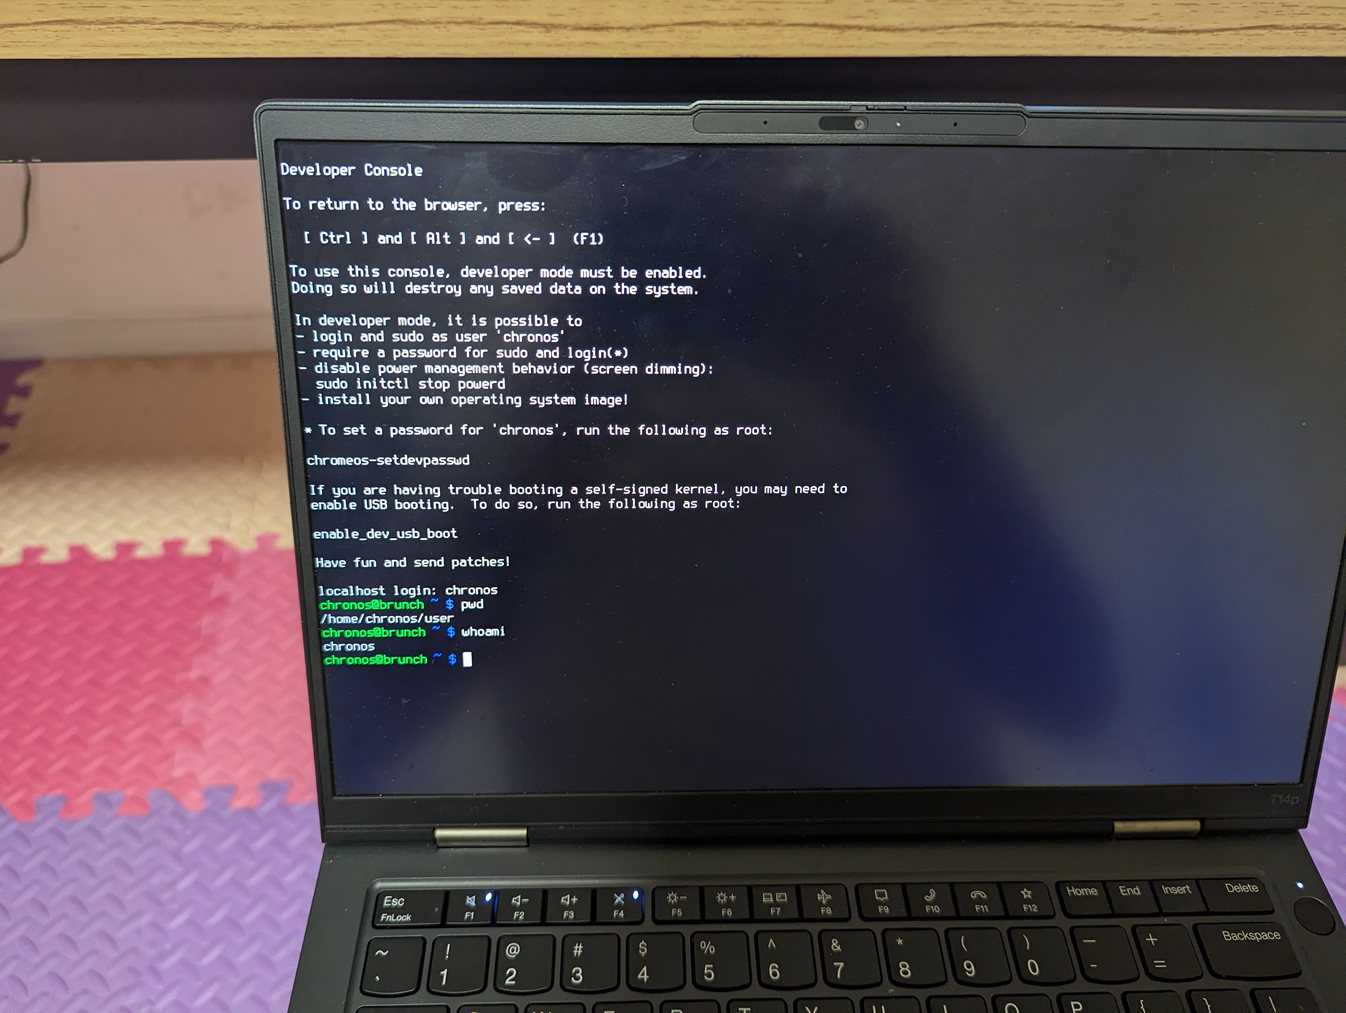
此时系统会提示登录,使用用户名 chronos 登录。
使用命令 lsblk 确认要部署的目标磁盘。它可能是:/dev/sda 或 /dev/nvme0n1。注意:Chrome OS 需要部署到一整块硬盘而不是一个分区!
然后运行下面的命令部署 Chrome OS 到硬盘:(损失硬盘上所有数据)
sudo chromeos-install -dst /dev/nvme0n1 <---- nvme0n1 应当是你的硬盘。
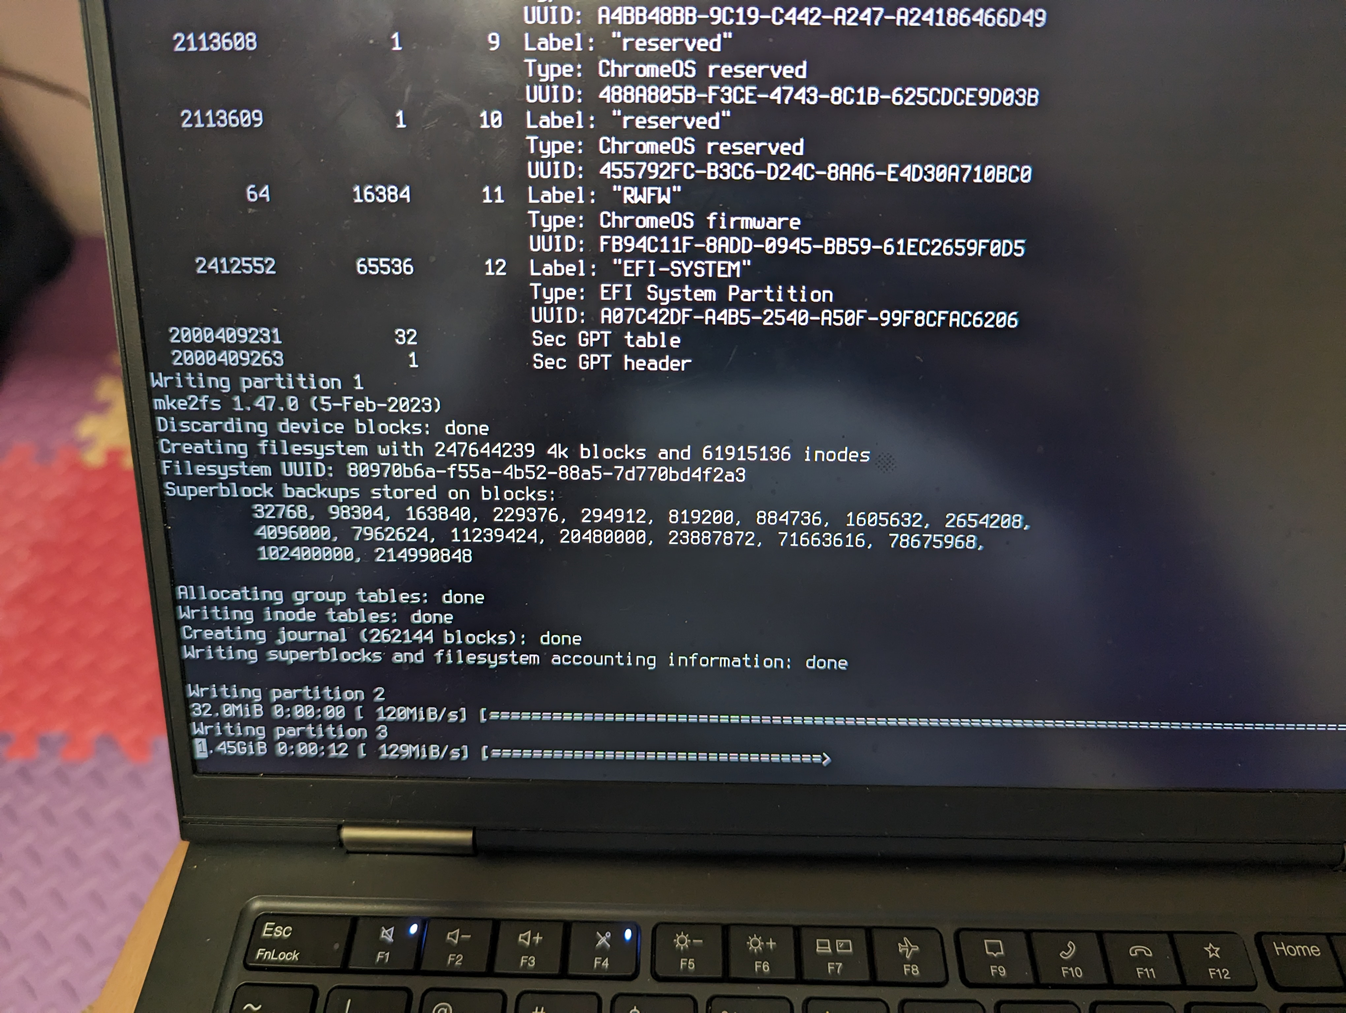
当命令结束后,重启电脑,拔掉 U盘。此时你的硬盘已经可以启动,并进入 Chrome OS。
第八步 - 第一次启动 Chrome OS
在这里,你仍然需要重走一次开箱指引的流程,登录谷歌账号。(自然需要科学上网,这部分显然我不应该教)
这一次结束后,将会看到 Chrome OS 的桌面。此时已经可以开始体验了。
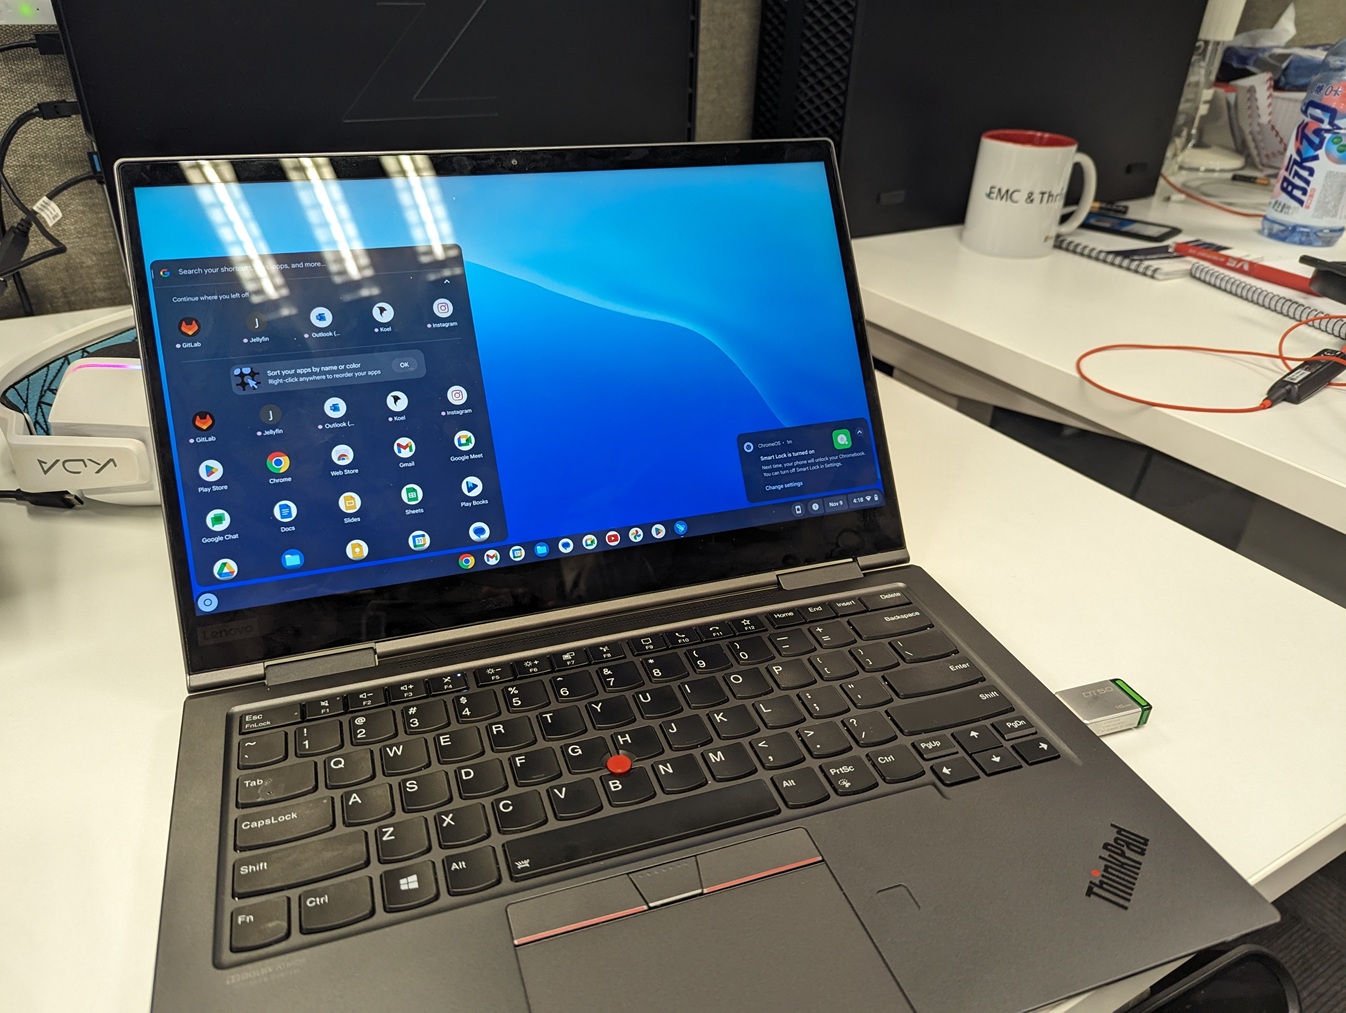
为了确保你的 Chrome OS 能够正确自动更新,我建议使用 Brunch 的更新工具。这是考虑到 Chrome OS 本身自己就有更新功能,而它可能会更新到一个 Brunch 不支持的版本。因此,使用 Brunch 的更新工具可以禁用 Chrome OS 的更新,来保证每次只会更新到支持的版本。
安装 Brunch 的更新工具的方法是打开:https://sebanc.github.io/brunch-pwa/ 打开后,Chrome 浏览器会询问是否安装此页面为 App,选择 Yes,随后即可打开并使用 Brunch 的 PWA 更新工具了。
另外,尽快检查一下设备是否可以:
- 使用触控板
- 使用Wifi
- 使用蓝牙
- 调节亮度
- 调节音量
- 使用摄像头
- 使用麦克风来录制视频
- 长按电源键来唤起关机菜单
- 切换为移动状态(拔掉鼠标、键盘)后可以正确进入平板模式
第九步 - 安装 Linux 并试试安装一些 GUI 应用
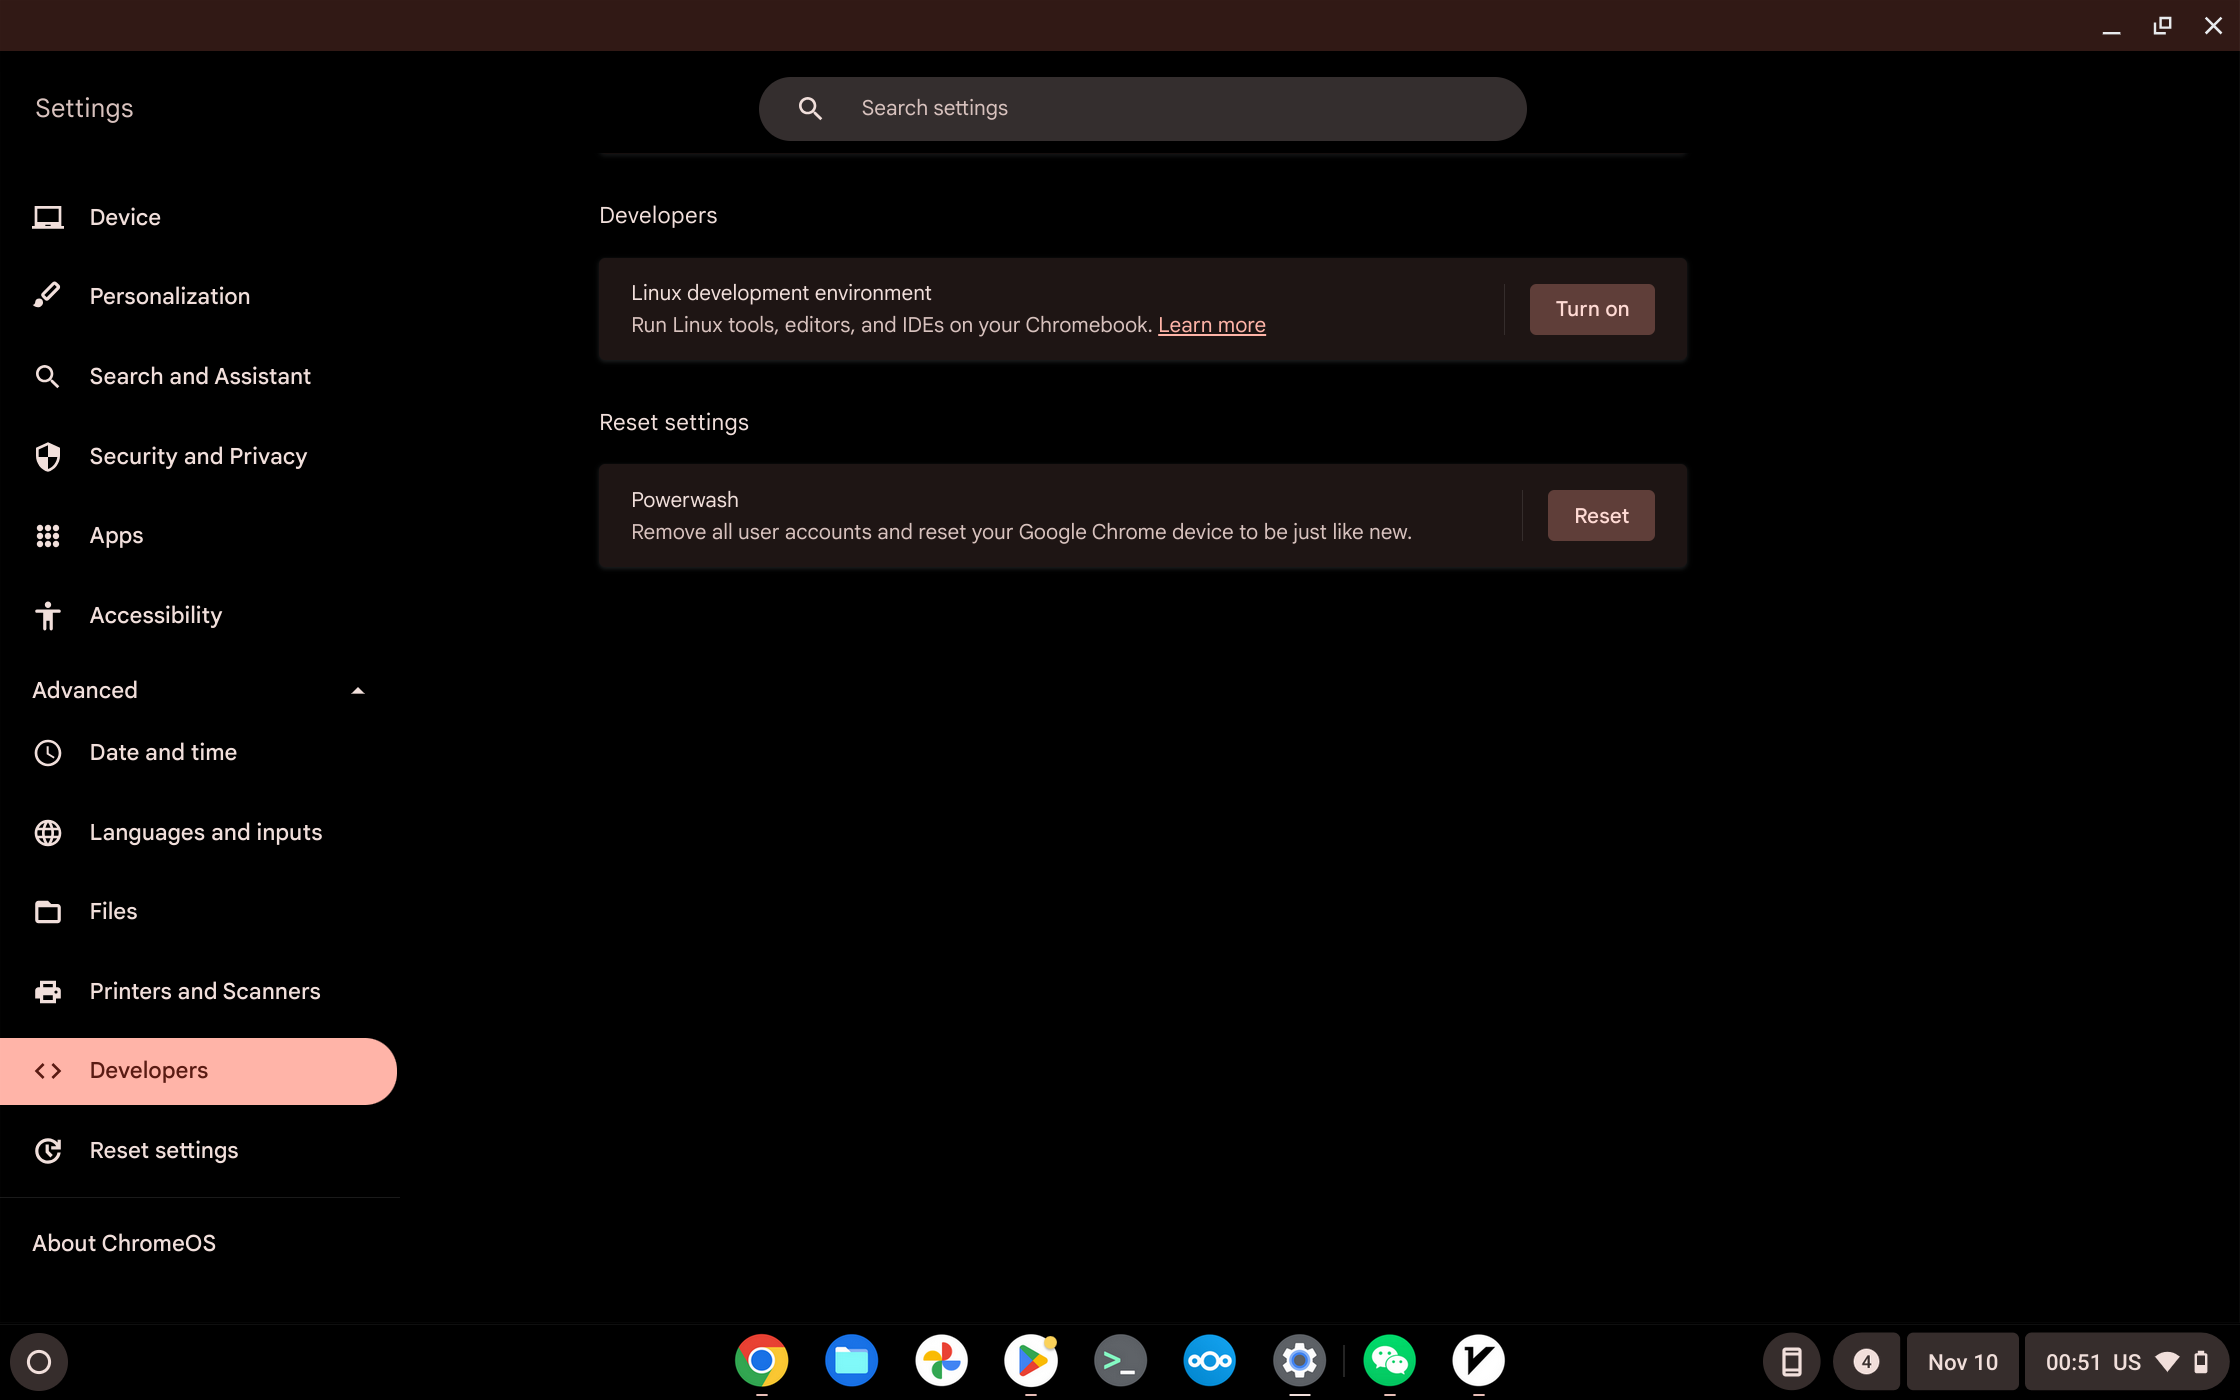
通过右下角的日期时间可以打开 Chrome OS 的设置。在设置左下角,找到 Advanced -> Developer ,即可找到菜单:"Linux development environment," 选择 Turn On.
随后需要设置 Linux 的分区大小。我设置了 128 GB。
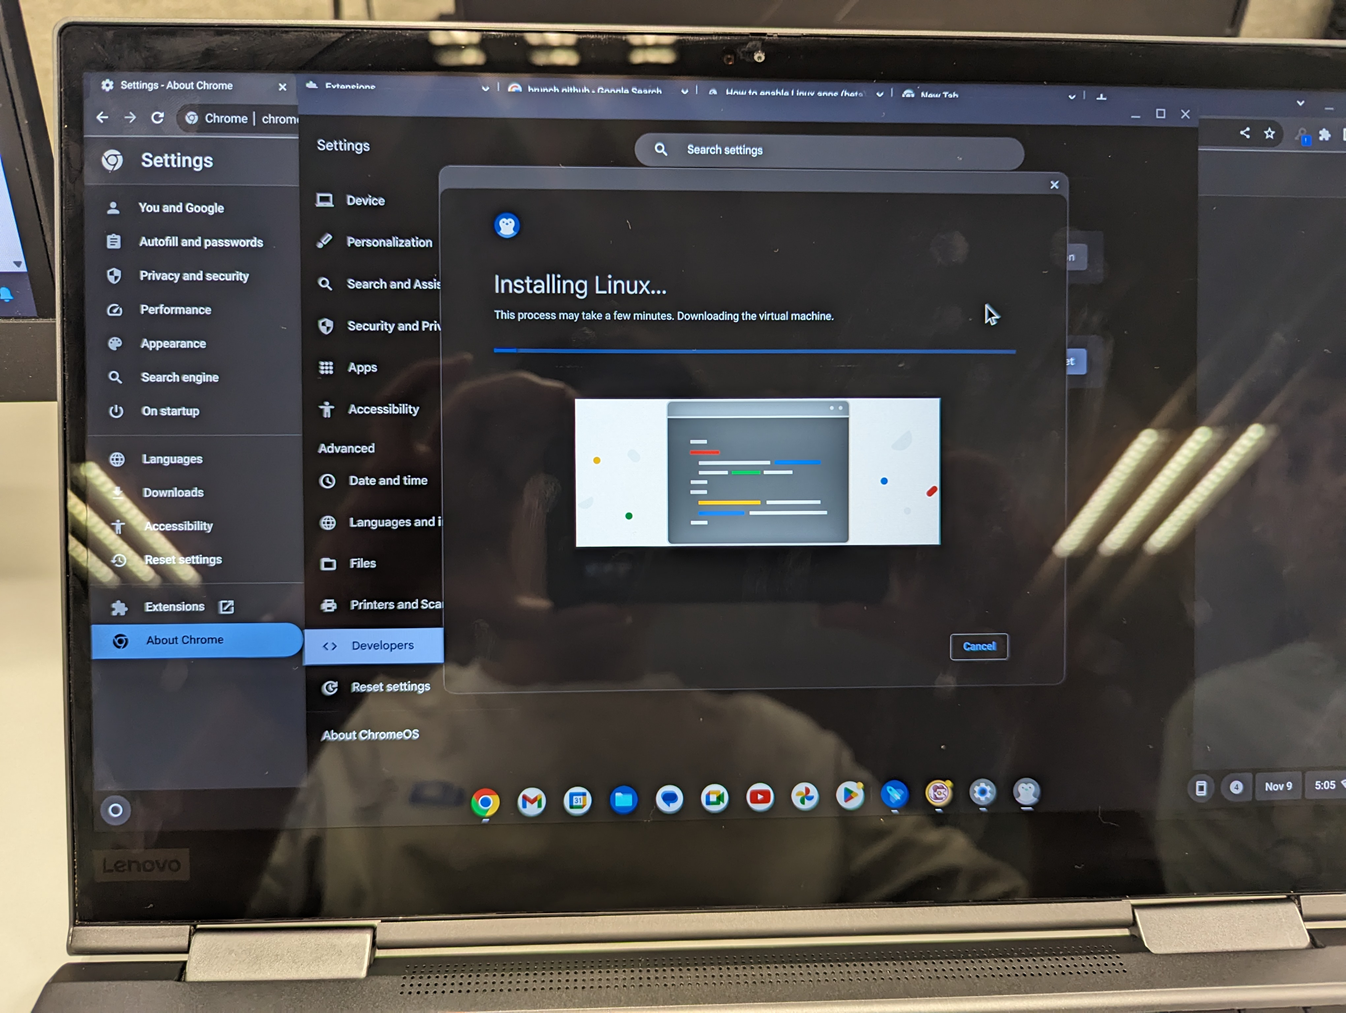
启动 Terminal 这个 App 即可进入 Linux。注意:这个 Linux 是一个子系统,它并不能访问到主机的关键硬盘、网络、设备等设置。
但是这个 Linux 可以安装和运行一些应用,尤其是图形界面应用程序,例如 VSCode,其体验还蛮不错。
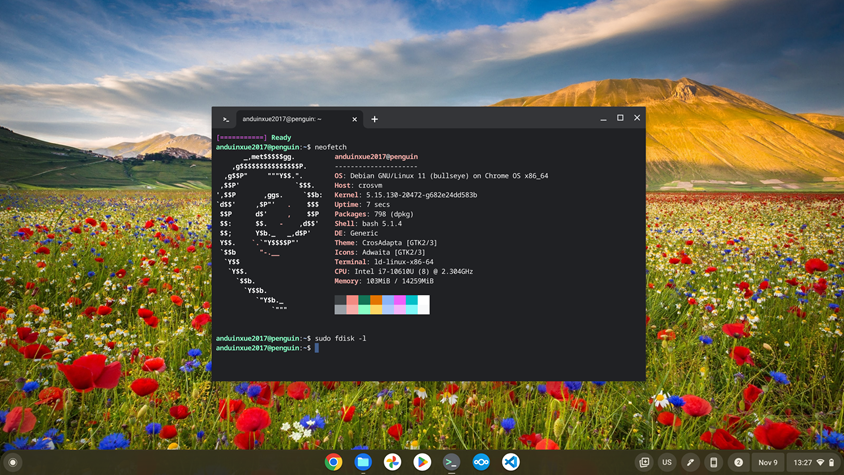
第十步 - 关闭开发者模式
为了访问 ChromeOS shell,ChromeOS 默认以开发者模式启动。
关闭开发者模式可以降低使用者的权限而提高安全性。可以从第 12 个分区的 grub.cfg 中手动删除 cros_debug,然后执行 Powerwash擦除所有数据分区。
这将删除 Chrome OS 的终端,也就是 Crosh shell。
第十步 - 理解这个操作系统
这个操作系统刚装完了会感觉很好用,但是很快就会发现它很多地方非常令人困惑。例如:它有至少三个设置:
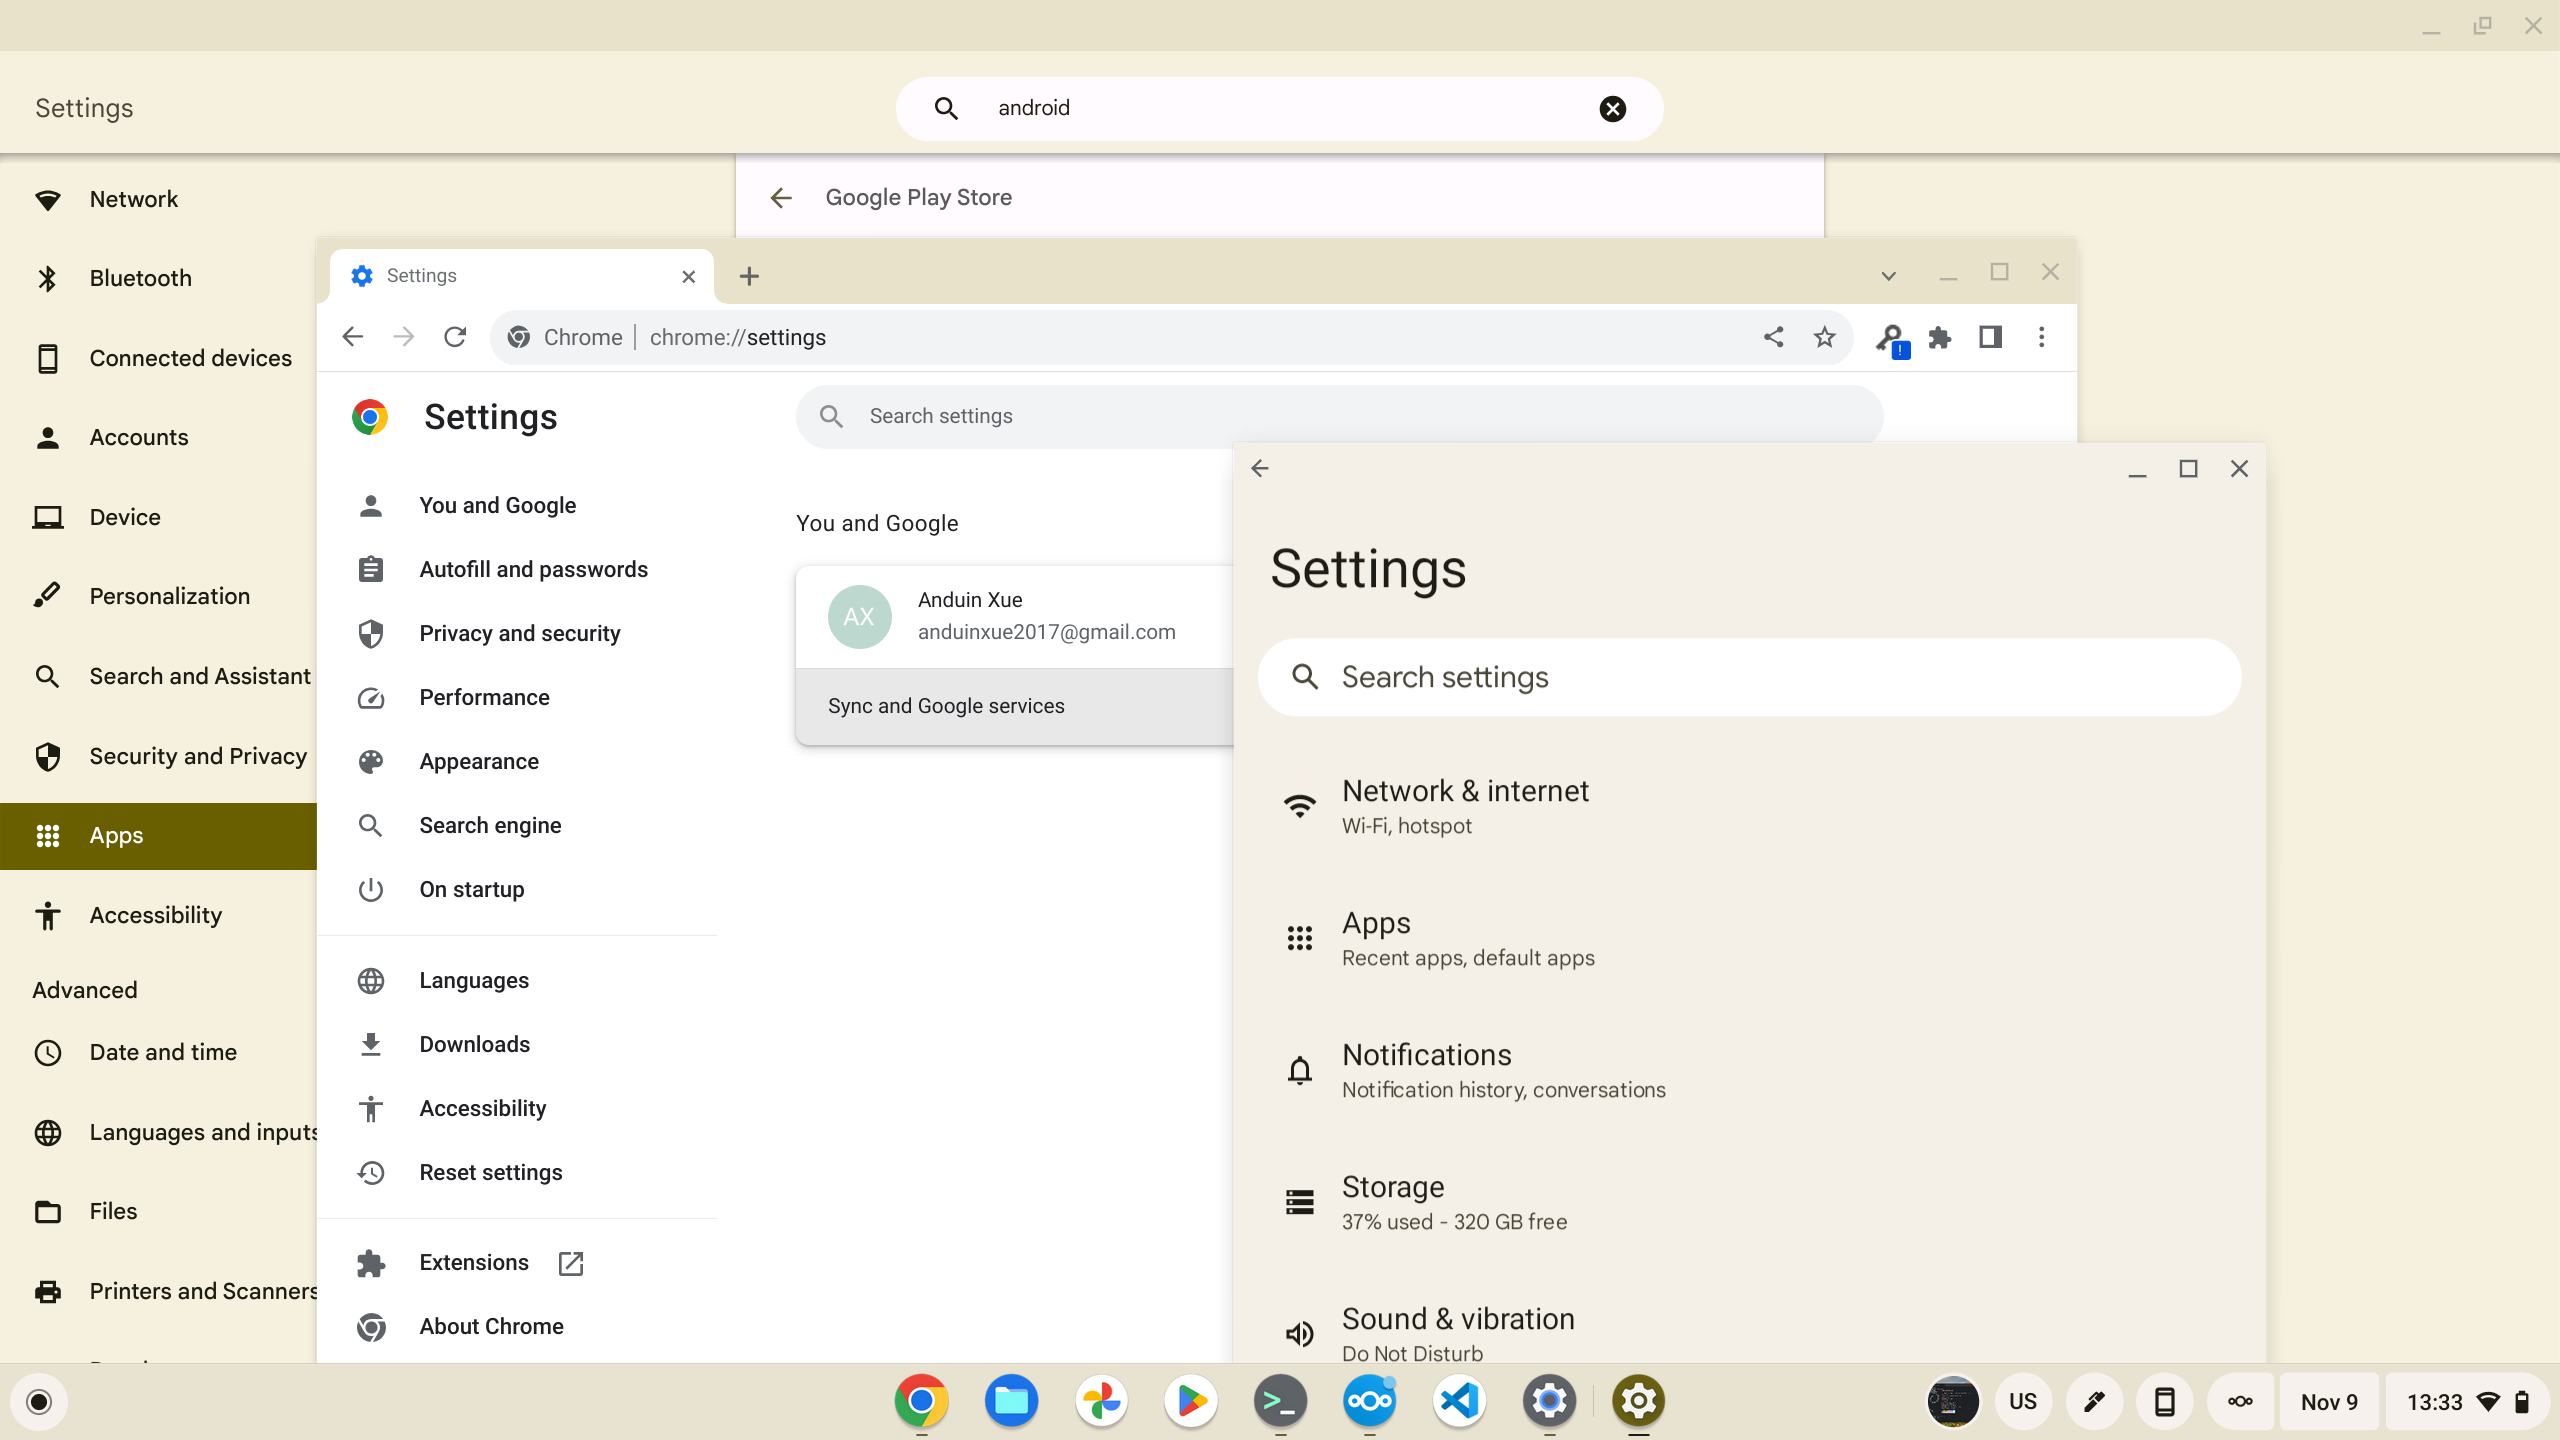
上面三个设置分别是:
- Chrome OS 新做的通用设置
- Chrome OS 过去曾经使用的 Chrome 浏览器本身的设置
- Chrome OS 启动的 Android 的设置
当然,它也会有三个终端,分别是:
- Chrome OS 本身的终端( Crosh Shell)
- Android 里可以安装的终端 App
- Linux 子系统的终端
和上面类似,包括配置代理的时候,也需要分别讨论代理的应用情况。因此这个操作系统理解起来需要有一定的 Linux 调试技能。
当然,作为一个 Linux 桌面来讲,它顺滑、流畅、完美运行安卓应用、有中文输入法、缩放不会糊、性能不错而且省电,而且很难用坏,简直是一个完美的笔记本体验。
这篇关于在老旧设备上部署魔改Chrome OS的教程内容详实,结构清晰,为技术爱好者提供了可操作的实践路径。文章的核心价值在于通过开源工具(如Brunch)和社区资源,将硬件资源利用效率最大化,体现了"软件适配硬件"的可持续理念,这一点值得肯定。
在技术细节处理上,作者对Brunch工具的魔改逻辑(如更新机制控制)和系统部署流程的拆解颇具专业性,尤其是对Live USB启动、硬盘部署、开发者模式切换等关键环节的分步说明,展现了系统部署的完整闭环。同时,对Chrome OS多设置入口、多终端分层等潜在使用痛点的预警,体现了作者对系统架构的深入理解。
需要补充说明的改进点包括:1)关于Brunch版本与Chrome OS版本的兼容性,建议增加版本对应表以避免安装失败;2)Linux子系统分区设置建议补充动态调整方法(如使用
sudo resize2fs);3)对禁用官方更新可能引发的安全风险需增加警示说明;4)硬件兼容性检测部分可补充dmesg或lspci等调试命令示例。文章在用户体验层面的闪光点在于:不仅提供了技术实现路径,更通过对比Chrome OS原生设置、Android设置、Linux子系统设置的差异,揭示了系统架构的复杂性,这种"技术透明化"的写作方式有助于读者建立系统认知框架。建议后续可增加对Crosh Shell与Linux子系统权限模型差异的解析,进一步提升教程的深度。
作为一篇技术实践类文章,其严谨性体现在对命令参数的精确标注(如
/dev/nvme0n1的指定)和对操作风险的明确提示(如硬盘数据清除)。若能在排版上优化命令行代码的高亮显示,并补充常见错误代码的排查指南(如OOBE卡顿可能的U盘读写速度问题),将更贴近读者需求。这篇文章详细介绍了如何在笔记本电脑上安装和配置Chrome OS,并探索了其作为多合一操作系统的潜力。作者通过分步骤的操作指南,展示了从制作启动盘到最终安装Linux子系统的过程,并强调了Chrome OS在流畅性、应用支持以及设备优化方面的优势。
文章还深入探讨了Chrome OS的复杂性,指出其包含多个设置界面和终端类型,这可能让初次使用者感到困惑。此外,作者提到需要一定的Linux调试技能来更好地理解和配置系统,这一点对于普通用户来说可能是一个挑战。
在安装Linux子系统的部分,作者展示了如何通过开发者模式启用该功能,并强调了其图形界面应用的运行体验。然而,也指出了Linux子系统的一些限制,如无法访问主机的关键资源,这可能对需要高性能或特定硬件支持的用户构成限制。
文章最后建议关闭开发者模式以提高安全性,并提醒读者注意系统的更新机制和代理配置等问题。总体来看,这篇文章为有兴趣尝试Chrome OS的用户提供了一个全面而细致的指南,同时也指出了系统中的一些潜在问题和优化方向。
如果你也有类似的经验或者对Chrome OS有进一步的疑问,欢迎分享你的见解或提出问题!
写的非常详细且用心,谢谢你的分享
装系统之前,不仅要在 BIOS 里检查是否关闭了安全启动,也应该检查是否启用了 VT 虚拟化技术,否则会出现子系统无法使用的情况,包括安卓子系统和 Linux 子系统都无法使用。
已经深度体验,下面是我的使用建议:
你的文章对于如何在老设备上安装 Chrome OS 提供了非常详尽的步骤和说明,这对于那些想要重用旧设备的用户来说非常有帮助。你的文字清晰,图片也很直观,使得整个过程看起来并不复杂。我特别赞赏你对每个步骤的详细解释,包括可能遇到的问题和如何解决它们。
你的文章主张通过安装 Chrome OS 来赋予旧设备新的生命,这是一个很好的理念。在我们生活的世界中,电子设备的更新换代速度非常快,许多设备在使用几年后就会被淘汰。然而,通过你的方法,这些设备可以被重新利用,不仅可以节省资源,也可以减少电子垃圾。
你的文章还详细介绍了如何在 Chrome OS 上安装和运行 Linux 应用,这对于那些习惯于使用 Linux 的用户来说非常有用。你的文章提供了一个很好的平台,让用户可以在一个熟悉的操作系统上运行他们喜欢的应用。
然而,你的文章可能可以在一些方面进行改进。首先,你的文章假设读者已经具备了一定的计算机知识,例如你在文章中提到了很多专业术语,如“Linux 子系统”,“UEFI 启动支持”,“Brunch 魔改工具”等。对于那些没有这些背景知识的读者来说,这些术语可能会让他们感到困惑。你可以考虑在文章中加入一些基础知识的介绍,以便让更多的读者能够理解你的文章。
其次,你的文章在描述一些步骤时使用了命令行。虽然命令行是一个强大的工具,但对于那些不熟悉它的用户来说,可能会感到害怕。你可以考虑提供一些图形界面的工具,或者提供更详细的命令行使用指南。
总的来说,你的文章提供了一个很好的指南,帮助用户在他们的旧设备上安装 Chrome OS。我期待看到你的下一篇文章!